Tuesday, January 27, 2015

lil carb Island Chicken Burgers


Here I am staring outside at the falling snow that will become a blizzard overnight and all I can think of is my honeymoon in Mexico... a far cry from where I am now!  But that's ok because I plan on transporting Jason and myself to a warm island tonight with the lovely flavors of what I like to call Island Chicken Burgers. I try to keep recipes simple most of the time but this one has a few ingredients from the Asian aisle of the supermarket. These items might seem like the opposite of kitchen staples- they definitely weren't for me about 2 years ago but now these are things I always keep on hand precisely for recipes like this!  You will be surprised how often you will use them.

For the burger I don't serve it in the traditional way with a toasted bun -sad face- although you certainly can! Instead I serve it with a lemon ginger mayo and a lettuce mix that I have tossed in a simple dressing- call it open-faced! Let's get started!

First I combined all of the ingredients for the lemon ginger mayo, mixed it well and put it into the fridge to chill. I didn't take a picture of that and I'm not sure why... ha

Next I combined the ingredients for the simple salad dressing, I whisked it together and put that in the fridge also. 

Then I started on the burgers.
I combined everything into a bowl and then I added the ground chicken!

What great colors!  I had to include 2 pics.. 


In goes the chicken and then I mixed well with my hands.


I melted butter and oil in a cast iron skillet.
Because the chicken mixture is very sticky I form it into a patty shape and place in the skillet and then spread it out with a spatula very carefully.


5-6 Minutes per side and then they're done!!

See below for the assembly!


Simple Lettuce Dressing:
1 Tbsp Sesame Oil
2 Tbsp Rice Wine Vinegar
1/8 tsp Garlic Powder
Pinch of Salt and Pepper
2 cups of Spring Mix Lettuce (1/2 cup for each burger)

*Whisk together all dressing ingredients and set aside.
Toss a lil dressing with spring mix lettuce and assemble burger as described below.

Lemon Ginger Mayo: - tops 4 burgers -
1/2 Cup Mayonaise
1/2 Tbsp Garlic, minced
1 tsp Fresh Ginger, minced
1 Tbsp Soy Sauce
Juice of 1/2 of a Lemon (use the one zested for the burgers)
1 Tbsp Green Onion, chopped
Pinch Pepper

*Combine all the ingredients, mix well and place in the fridge so the flavors can merry and the mayo can chill. Refrigerate for 30 minutes or up to 3 days.

Chicken Burgers: -Makes 4 Burgers-
1 Lb Ground Chicken
1 Egg
1 Tbsp Garlic, minced
1 Tbsp Fresh Ginger, minced
3 Tbsp Green Onion, chopped
Zest of 1 Lemon
Juice of half a Lemon
1 Tbsp Soy Sauce
3 Tbsp Almond Flour
1/2 tsp Pepper
1 Tbsp Sriracha Sauce

2 Tbsp Olive Oil
1 Tbsp Butter

*Combine all of the burger ingredients except the oil and butter and mix well with clean hands. Next heat oil and butter over medium heat, I like to use a cast iron skillet. Form the chicken mixture into 4 patties. (Hint: they will be very sticky. I like to section out the chicken mixture and grab 1/4 of it and place it into the pan and then carefully form it into a flatter patty.)  Cook for 5-6 minutes per side and transfer to a paper towel lined plate.

To assemble the burgers... Start with a spoonful of lemon ginger mayo on the plate. 

Then place the chicken burger on a plate and top with another good dollop of the lemon ginger mayo. 


Next top it with the mix greens that were tossed in the quick dressing above.
Sprinkle on a few toasted sesame seeds and serve with a knife and fork!


I served this along side Ree Drumonds Spicy Cauliflower Stir Fry - why fix what's not broken?! 
Her recipe is the best!!!  It went perfectly with my chicken burgers.


Jason and I! Here we are at a Sunset-5-Course-Lobster-Dinner... oh Mexico how you spoiled me!


Monday, January 26, 2015

lil carb Beef Stew

In preparation for the upcoming blizzard I stayed home from work and luckily I did because I am able to share this recipe with you!  Are you ready for the perfect snow day meal?! It's the kind of meal that will make you feel warm and fizzy inside. Even though snow is falling outside, inside you will be cuddly and satisfied with a belly good dinner.

Comfort food to the max!  OMG, it really is amazing!  The flavors in this classic comfort food dish are so savory you would never know that I modified it to be lower carb. Before this recipe I would think of beef stew as potatoes and dry meat- this recipe is the total opposite. You have to make it! Simple ingredients but loads of flavor.

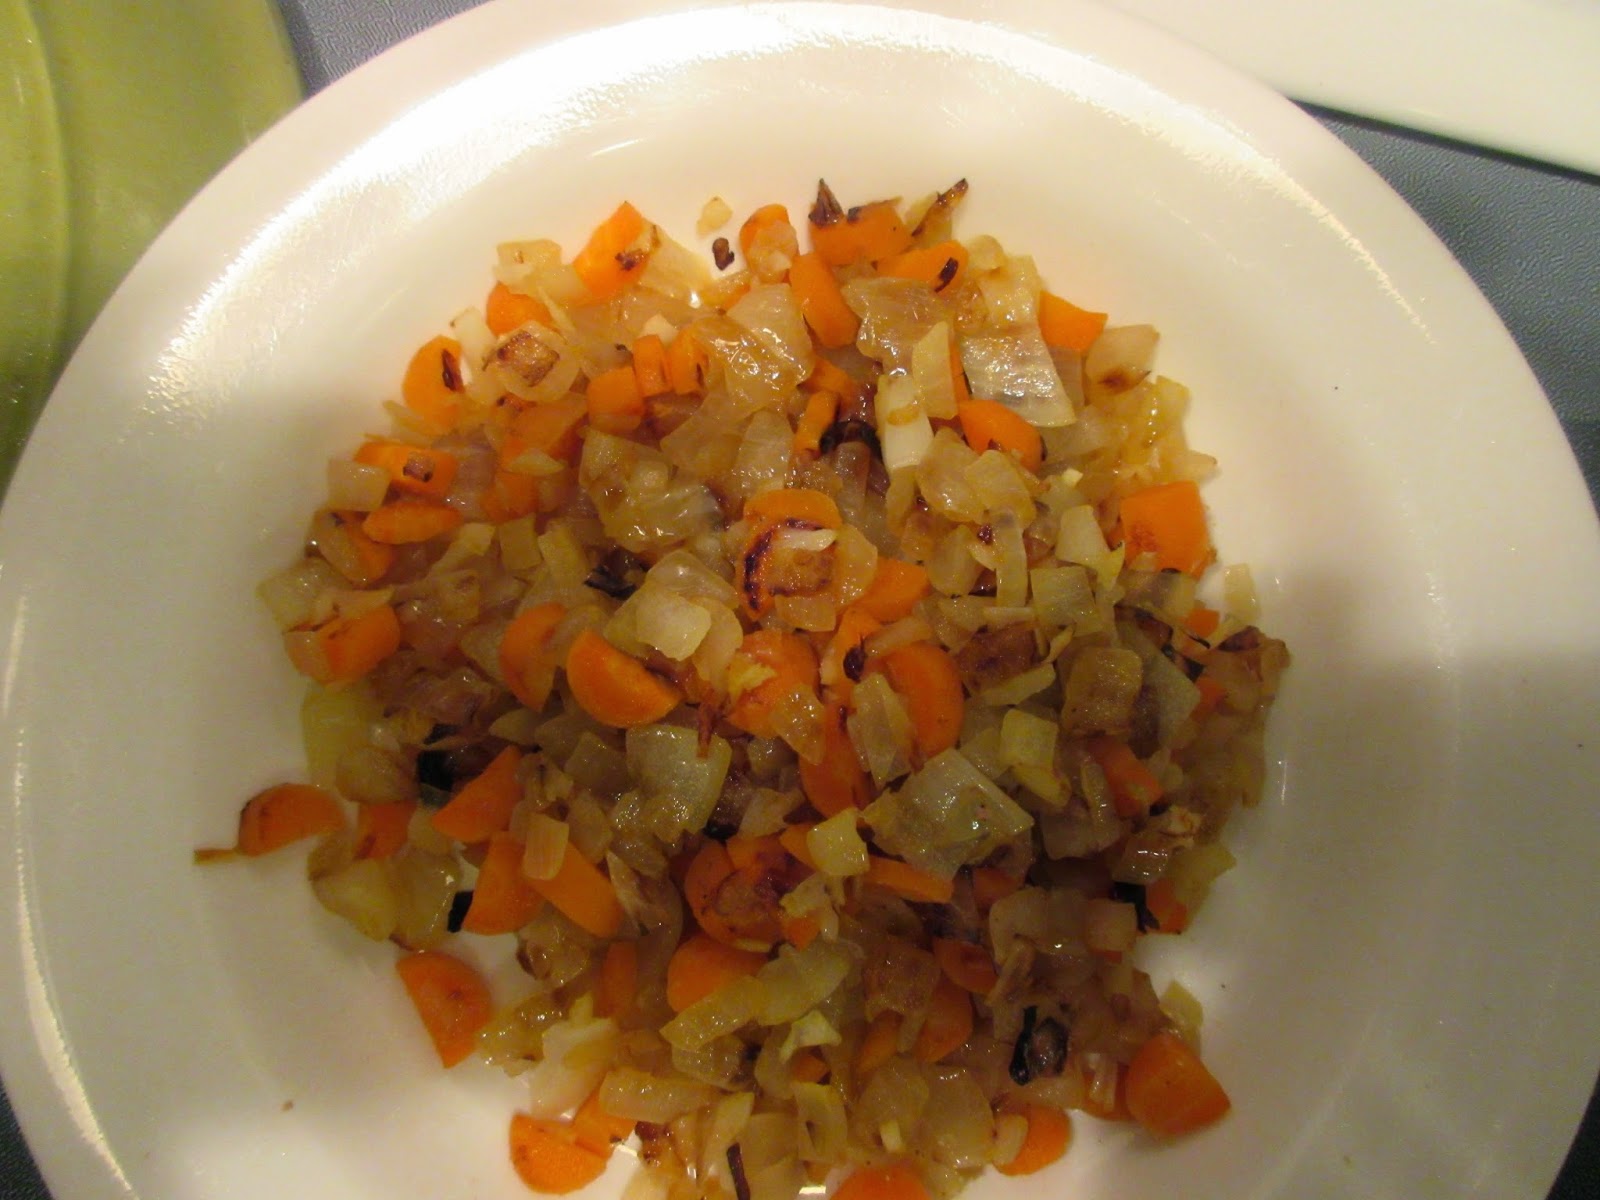
I started out with traditional stew ingredients- onion, garlic, and carrots all diced and sautéed in veggie oil.


I use baby carrots because I always have them in my fridge and they are already prepped for dicing- less work for me!


Once the veggies are softened and getting brown edges I remove them to a plate - we'll add them back in in a lil bit!

Instead of a traditional all purpose flour dredge I used coconut flour. 
For the meat- the supermarket makes it SO easy - they had pre cut and trimmed "stew meat".  It was all meant to be! Once again- less work!  I salt and peppered the meat and dredged it in the coconut flour.

To the stew pot that I cooked the vegetables I added in some more vegetable oil and browned all sides of the meat. 
I had to do about 4 batches because I did not want to crowd the pan and steam the meat.  
Instead, I wanted a nice brown crust.  In between each batch I used a lil more oil.

Just look at that meat!  Still pink on the inside but a nice crust on the outside- that is what I'm lookin' for!

Yuuuummmmm!

After all of the meat is browned I poured in red wine!  Oh the heavenly aroma at this stage of the game... let that delicious smell perfume your kitchen and let the wine reduce. 
Scrap the bottom of the pan for all the great meat bits that were left behind! 
Once the wine is reduced, add the meat back into the pan along with the softened veggies.

Then everybody gets into the pot... First: 2 cans of whole tomatoes, a bay leaf, fresh oregano, parsley and thyme, and beef broth. I also add in a 1/2 can of water from the tomato can to get all the flavor out of it. 


As far as the fresh herbs go- check your supermarket.  For 99 cents you can get about 3 tbsp worth of fresh herbs all year round- just enough for a meal or two without breaking the bank!

Then I add in mushrooms (I used just white button mushrooms that were already prepped and sliced- again- super easy!) and baby carrots that I cut into 3rds but you could certainly leave them whole.

Bring this mixture to a boil then lower the heat and simmer with the lid ON for about 45 minutes. Mixing every so often. Then remove the lid and simmer another hour and 15 to hour and a half with the lid OFF.  
Add in salt and pepper to taste and serve garnishing with parsley and parmesan cheese!

Lil Carb Beef Stew: -Serves 6-8-
3 lb beef stew meat, trimmed and cut into chunks
Vegetable oil, divided about 9 Tbsp
1 large onion, minced
About 10 baby carrots cut into a small dice - 1/2 cup
3 garlic cloves, minced
1/3 cup coconut flour
Salt and pepper to taste
1 cup red wine
2 28 oz cans of whole tomatoes 
- plus 1/2 can of water
1 3/4 cups beef broth
1 bay leaf
1 Tbsp fresh oregano, chopped
1 Tbsp fresh thyme, chopped
1 Tbsp fresh parsley chopped- plus some for garnishing
6-8 oz white mushrooms, whatever your supermarket has
About 20 baby carrots cut into 3rds- about a cup
Parmesan cheese for garnish

Heat a stew pot on medium high heat and warm 1 Tbsp vegetable oil and sauté the onion and small diced carrots for about 7-8 minutes. Add the garlic in and cook for another minute, stirring often. Remove the veggies from the pan and heat 2 Tbsp vegetable oil in the same pot.  Salt and pepper the beef and dredge in the coconut flour. In about 4 batches brown the meat on all sides until a brown crust forms. Be careful not to crowd the pan. Before starting a new batch add in another 2 Tbsp vegetable oil. When the meat is done browning, remove it to a plate.  To the stew pot pour in the red wine and scrap the bottom of the pan to loosen all the flavorful meat bits.  Let the wine reduce for 5 minutes. Then add the meat and sautéed veggies back into the pot. Pour in the 2 cans of tomatoes plus the 1/2 can water, beef broth and the fresh herbs and bay leaf. Stir. Then add in the mushrooms and big carrot chunks. Bring to a boil then lower the heat to medium low and simmer with the lid ON for 45 minutes. Stir every so often. Then remove the lid and simmer with the lid OFF for another hour and 15 minutes to an hour and a half. Season with salt and pepper. Remove the bay leaf and serve up a big bowl and garnish with chopped parsley and parmesan cheese.

Sunday, January 25, 2015

lil carb Blue Cheese Vinaigrette

Watch me make this!

I love making homemade salad dressings. I have already shared my caesar dressing but I have plenty of others up my sleeve.  The one I made today was a blue cheese vinaigrette.  We just got about 6 inches of snow outside and my diligent husband is outside shoveling and snow blowing.  He motioned from the window he was hungry and I knew telepathically he wanted a salad. How? I just knew. ha

Since he loves blue cheese and I happened to have blue cheese crumbles I went to work making my blue cheese vinaigrette so I could get it in the fridge to chill while I assembled the rest of the salad. Into a small mason jar I put olive oil, red wine vinegar, dijon mustard, salt, pepper, green onion, and blue cheese crumbles. Then I gave it a shake until it was combined then I put it into the fridge. 

Next I assembled one of Jasons favorite salads- spring mix, black olives, cherry tomatoes, pepperoncini peppers, rotisserie chicken and blue cheese crumbles!


Blue Cheese Vinnaigrette:
1/3 cup olive oil
2 Tbsp red wine vinegar
1/2 tsp salt
1/4 tsp pepper
2 tsp dijon mustard
2 Tbsp green onion
1/4 cup blue cheese crumbles

Whisk or shake in a mason jar all ingredients except green onion and blue cheese crumbles until well combined. Then add in green onion and crumbles and give another quick shake or whisk. Chill until salad is ready. 

*The longer this dressing sits in the fridge the better it tastes! I like to make it and then allow it to sit in the fridge for at least 2 hours before I serve it!
*As a side salad I love to use spring mix lettuce, cherry tomatoes, and thinly sliced red onion!
ENJOY!


Saturday, January 24, 2015

Broccoli- Double Cheddar- Bacon Frittata- lil carb of course!


On this snowy Saturday morning I made the most wonderful frittata for Jason and I.  We finished the whole thing between the two of us. Now we have the energy that we need to shovel ourselves out! I'm not babbling much today because I want to share this amazing recipe!

I started by cutting up some bacon.  I kept the pieces a little larger than I would usually because I wanted bigger pieces to bite into in the frittata.

In a my cast iron skillet I cooked the bacon until it was nice and crispy but not burned.

After the bacon was nice and crisp I removed it from the pan and let it drain on a paper towel.

Then I chopped a garlic clove, an onion, and some broccoli.
The broccoli I cut pretty small.  

Then I added those 3 ingredients into the skillet that I had cooked the bacon in. Don't drain the bacon grease, there isn't much and it has such great flavor!

While the broccoli, onions, and garlic are sautéing, whisk 7 eggs with a healthy pinch of salt and pepper.

Turn off the heat for the skillet, add the bacon back in and then add the egg mixture to the skillet. 
I like to make sure the broccoli and bacon are distributed evenly throughout the frittata so I spread it around just a little. 

Than I used 2 types of cheddar cheese; white and yellow! 
Yummmm

I topped the frittata with white and then yellow cheddar.

Popped the whole skillet into the oven! 
Thats why I love this cast iron skillet! If you don't have one... you need one.... because I said so.

Look at that!  With the help of the skillet the egg makes this amazing "crust" the texture was the same as a flour crust!
The cheese gets nice and golden and crunchy... jeez get me a knife to cut into this thing!!! 

And there you have it!  A gloriously lil carb breakfast! 
Jason and I ate this whole 10 inch skillet worth... well we may have shared with the chow bears... but it was enjoyed by everyone! 

Broccoli- Double Cheddar- Bacon Frittata: 
-Serves 3-4-

6 slices of bacon, cut 
1 small onion, chopped
2 garlic cloves, minced
1 cup broccoli florets
3/4 cup cheddar cheese, white or yellow or both
7 eggs
Salt & pepper to taste

Preheat oven to 450 degrees.  Heat cast iron or oven proof skillet over medium high heat and cook bacon for 6 minutes or until crispy. Remove from pan and drain on paper towel. Without cleaning the skillet add in the broccoli, onion and garlic and sauté for 3 minutes.  Then turn the heat off on the skillet.  Whisk together eggs with a pinch or two of salt and pepper.   Add the bacon back into the skillet with the broccoli and then pour the egg mixture into the skillet making sure the broccoli and bacon and onion are evenly distributed throughout. Top the skillet with the cheddar cheese and put into the oven.  After is bakes for 20 minutes it is ready to be gobbled up!

Tuesday, January 20, 2015

lil carb Italian Sub Bites


Click the video above to watch me make this!

I'm always looking for new and innovative ways to take full carb foods and reinvent them to be low carb.  Sometimes it is harder than others but this idea came to me over the summer when I was trying to figure out what to bring to a family picnic.  This appetizer includes elements of an Italian sub sandwich but without the carbs! They are pretty easy to assemble too! I brought a whole plateful of these to the picnic and I make them all the time and store them in the fridge for a snack for Jason and I.  They're the perfect bite of protein and flavor without the carbs!  I never bring any home- they're always devoured.

I used salami, pepperoni, provolone cheese, pickles and 'sub sauce' as I call it. 
I found the 'sub sauce' right at the deli counter at Walmart!  It was only $2.00- economical and full of the exact flavor my lil sub bites were needing. The flavors are oil, vinegar and a bunch of herbs.

To assemble the sub bites I get my assembly line ready. I use dill pickle chips. You could use bread and butter pickles but they do have more carbs than dill. I cut a little 'hat' off the one side of the pickle circle. I do this so that I have a 'hat' to put on the top of the sub bite and also it helps the bites to stand when laying the bites on their side. - See my picture I bet that will help make sense of my babbling.

I buy deli salami and deli pepperoni, and provolone so they are already sliced in thin, big circles.
The provolone circles I cut in half and then half again so I have 4 triangle shapes for each slice of provolone. For the salami and pepperoni I use one slice of each for each sub bite. 
I fold them in half and then half again to form the same triangle shape as the provolone cheese. 

To assemble I take a toothpick and poke it into the middle of a pickle slice with the hat cut off. Then I thread a triangle of provolone cheese then a folded slice of pepperoni then a folded slice of salami then another triangle of cheese then I top with my pickle 'hat' and set it on the platter.  

Right before serving I drizzle the platter with 'sub sauce'... act quickly- I barely got a chance to take this picture- it was on the table for 2.5 seconds and theres already a huge dent missing.

Perfect for a low carb appetizer or a snack to keep in the fridge so when you're sub craving hits you're ready!

Sunday, January 18, 2015

Citrus Surprise- Lil Carb Orange Chicken

When Jason and I got home last week there was a fairly large package on our front porch.  Last year with all my wedding planning and then Christmas there was a package on the front porch every other day but after the holidays the packages have stopped- until now!  The box was a gift from a close family friend of Jasons who lives in Florida and was full of perfect, bright, Florida Oranges!  What a lovely surprise! So me being me I immediately ate one and it was honestly the best orange that I've ever had and since New Jersey has been freezing lately the front porch keep the oranges nice and chilled.  What a perfect after-work snack!  After I devoured the orange my brain got straight to work on all of the things I could make with these beauties. My first thought was orange chicken- one of my takeout favs. Only problem with this recipe is the ones that I have used in the past are far from low carb.  So instead I went to Pinterest to try to find a low carb version and I found it! I am very fond of this blog in general so to find the recipe I was looking for on it, really made my night. Here is the link to the blog I Breathe I'm Hungry and her Orange Chicken Recipe.  I did modify a few things to suit what I had on hand so it is not exact. See how I made my version of her amazing recipe below!

I started off with boneless skinless chicken breasts. I cut them into bite size pieces. 


I made her dredge of a lil bit of cornstarch and coconut flour. 
This was a perfect dredge by the way- I will be using this mixture in place of all purpose flour because that is a common ingredient in a lot of recipes that I have from before we went low carb.
Even though it's a small amount of dredge I still had some left over after I coated all of my chicken. 


Then I used vegetable oil in a cast iron skillet and browned all of my chicken pieces. It took me 3 batches to brown it all. Adding a lil more vegetable each time.


Salt and pepper chicken and dredge...


Fry in veggie oil...


Flip when golden!


I followed IBIH's lead and pulsed my sauce ingredients in my Nutribullet!
I used fresh orange juice, fish sauce, soy sauce (I'm pretty sure mine was NOT gluten free), fresh chopped ginger, liquid stevia, water, and because I didn't have orange extract I used orange zest.  
If you think you can't find ginger look again because they now carry it at Walmart! I love keeping it in the fridge and lopping off sections as I need it. It really adds a great freshness to dishes like this!


After it has been pulsed I added it to the cast iron skillet I used for the chicken.  I did clean the skillet out first with a paper towel to soak up the left over oil.
After cooking down the sauce I added the chicken back in and tossed it around so it was all coated in this glorious orange sauce- which smells amazing!  Knowing these oranges were sent with love also makes me smile :)
I cooked the chicken in the reduced sauce for a few minutes then I added in sesame seeds, green onion slices, and cayenne pepper.  I don't know how but I ran out of crushed red pepper flakes.. don't tell Jason! He loves them. But don't worry I was able to replenish our stock today without him noticing! ha


Then it is ready to serve! Which is good because I honestly don't think I could have waited a minute longer... eating low carb I never have Chinese food so I've been looking forward to this for way too long! I garnished my plate with extra orange zest, sesame seeds, and green onion.


I served this on top of my fluffy cauliflower rice!  
It's so easy! Jason actually said this "rice" was the best I have ever made!


It's hard to look at this picture and not want to make this right now. You have to give this recipe a try.  
Thank you IBIH!!! 

My Version of IBIH's: Low Carb Orange Chicken - Serves 2 -
3 boneless skinless chicken breasts, cut into bite size pieces
1 Tbsp cornstarch
1/4 Cup coconut flour
Salt and Pepper
Vegetable oil- for frying- about 4 Tbsp total

Orange Sauce:
1/4 cup orange juice- I used fresh squeezed
1 1/2 Tbsp ginger, chopped
2 Tbsp fish sauce
2 Tbsp soy sauce
1 skant tsp liquid Truvia, add more or less depending on sweetness preference
1 Cup water
2 1/2 Tbsp orange zest, divided
1 Tsp sesame seeds, divided
3 Tbsp green onion, chopped and divided

Cut up chicken into bite size pieces, season with salt and pepper. Combine cornstarch and flour and dredge chicken.  Over medium heat add 2 tablespoons of vegetable oil to a skillet and brown the chicken in batches.  I did 3 batches adding 1 extra tablespoon between each batch.  Remove chicken to a platter. Wipe out the skillet.  Into a blender or Nutribullet container add in ginger, fish sauce, soy sauce, Truvia, water, and 1 tablespoon of orange zest and pulse for about 45 seconds. Add that mixture into the cleaned out pan and reduce down on medium heat- about 5 minutes. Add the chicken back in and stir to coat.  Cook for another 2-3 minutes. Sprinkle on 2 tablespoons of green onions, 1/2 teaspoon sesame seeds and 1 tablespoon of orange zest. Mix together.  Serve over my Cauliflower Rice and garnish with remaining green onion, sesame seeds, and zest!