This chicken salad has a hold on me! Not only is it the best I ever had but you can make it in a matter of minutes in the food processor and customize it to make it your own. It's also high protein and low carb if you make it exactly like me! Which will help you meet your protein goals and keep you full for hours!
SAUCE: ½ cup mayo
¼ cup cottage cheese
2 cloves garlic
1 tsp soy sauce
1 tbsp rice wine vinegar
Juice of ½ lemon
Season with black pepper, celery salt, and paprika
This smoothie has become an obsession. By obsession I mean I'm eating it 5 out of 7 days per week to break my fast and I LOVE IT! It's super creamy like a milkshake and my recipe makes a BIG smoothie. Like 32 ounces, big! It's nutty and fruity and smooth with a touch of sweetness. Plus it packs a big protein punch at 58 grams of protein! This smoothie keeps me full for HOURS. Highly recommend if you are looking for a low carb, high protein lunch or breakfast. Try it and tell me what you think!
Craving fast food but all of a sudden I'm mad I can't have the bun... LOL I have reached that point in my life. Since I'm sticking to my weightloss goals I needed to find a way to recreate these fast food flavors at home and make it so delicious that I didn't feel deprived. And now we have the Cheeseburger Quesadilla. If you are keeping this Keto and Low Carb friendly the ingredients really matter. I used low carb wraps by Ole and I use low sugar ketchup and I only use a tiny bit. Check out the links below. If you try this one make sure to tag me on social media (Instagram @lil_piece_of_hart). Check out the video above for a tutorial on how I made these... and then once you're done with the video MAKE THEM! You will not be sorry!
Cheeseburger Quesadilla- Makes 1
1/4 lb ground beef 2 slices of cheese (I used American) 1 1/2 Tbsp chopped white onion 5 dill pickle slices 1 wraps of your choice (My Fav) 1/2 Tbsp yellow mustard 1/2 Tbsp low sugar ketchup (Why I use Heintz) 1 tsp extra virgin olive oil salt and pepper small pat of butter
Heat a heavy skillet (I used my cast iron) on high heat and add in the olive oil. Allow to get very hot and then add in your ground beef. Flatten with a spatula to make one big patty. Season with salt and pepper. Allow to cook until a crispy crust has formed. Flip, season the other side with salt and pepper and then once it is cooked through, transfer to a plate.
For this next step of making the quesadillas I used my nonstick skillet.
Heat skillet over medium heat and rub the butter on the bottom of the skillet in a thin coating. Place a tortilla in the skillet and add in one piece of American cheese onto one side of the tortilla. Then add in half of the meat, cutting the meat to fill one side of the tortilla.
Top with onion, mustard, and ketchup Then add 5 pickle slices and the other slice of cheese.
Fold the wrap over and cook for another 30 seconds or so until the bottom of the tortilla is browned. Then flip over and cook an additional 30 seconds to a minute until the cheese has melted and the bottom of the tortilla is browned.
Remove from the heat, cut into wedges or halves and ENJOY!
This recipe uses 3 main ingredients, some butter and some spices and WOW is it delicious. I love this recipe for transitioning back into a low carb diet because it's not super low in carbs coming in at 14 net so its great for everyone! Plus sweet potato have so many health benefits- they are a great source of fiber! And the fiber and antioxidants are great for your gut health. I also like to add in other vegetable to the sauté if I have them on hand- if you try this one let me know how you liked it down in the comments!
Sweet Potato Eggs- Serves 2
5 oz sweet potato, shaved into ribbons
1/3 cup white onion, chopped
2 Tbsp butter
4 eggs
Salt, pepper, and garlic powder to taste
In a non stick skillet over medium-high heat melt 1 tbsp of butter and add in the onion and sweet potato ribbons. Saute for 6 minutes stirring often to prevent burning. You want the sweet potato to get nice and crispy edges.
After 6 minutes move the sweet potato & onion mixture to the outer portion of your pan. Add in the rest of the butter (1 tbsp) to the middle of the skillet.
Crack your eggs into the melted butter and cook to your desired doneness. Flipping half way through cooking if needed.
Serve by scooping out the sweet potato mixture and adding the eggs right on top. ENJOY!
Breakfast is a time of the day when I really like to eat something filling and savory. This recipe is just that! It makes the perfect recipe for your brunch or lunch table for entertaining as well! With the garlic and herb flavors from the spreadable cheese paired with the creamy avocado and crunchy toast it is just perfection. This is also a great transitional recipe if you are re-starting a low carb lifestyle and slowly lowering your carbs. You can also customize this recipe with the cheese flavor you use, the toast brand, and how much avocado you prefer.
Garlic and Herb Cheesy Eggs & Avocado Toast- Serves 1
1 egg
1 tsp heavy cream
1 Tbsp garlic & herb cheese spread, I use Alouette Brand or Boursin Brand
1/2 avocado
1 slice of your favorite toast, I use Daves Killer Bread (thin sliced)
salt
pepper
crushed red pepper flake (optional)
1/2 tbsp butter
Whisk together the egg, heavy cream and a pinch of salt and pepper.
In a small pan melt the butter and scramble the eggs to your liking. Then mix in the cheese spread and allow to warm up. Mix in the cheese with your eggs as it warms up.
Remove from heat.
Smear the avocado on top of your toast and season with salt, pepper, and crushed red pepper.
Top with your egg mixture and ENJOY!
If you are a taco lover like myself, you will absolutely love this dish. I make tacos a lot for dinner which means I always have leftover taco meat. This is one of my favorite ways to use it up and make a filling, low carb meal! I say meal by the way because I eat this for breakfast, lunch OR even dinner! Whenever the craving hits! The best part is you can use your favorite cheese, your favorite salsa, or even add queso or guacamole or whatever toppings are your favorite!
Taco Eggs- Serves 1
1/4-1/3 cup leftover taco meat (beef, chicken, or turkey seasoned with Taco Seasoning)
1 egg
1/2 Tbsp butter
1 Tbsp half and half
1/4 tsp Taco Seasoning
1/4 cup of your favorite cheese (I use a Mexican cheese blend)
Plus any toppings you choose!
In a bowl whisk together the egg, half and half and 1/4 tsp taco seasoning and set aside (add a pinch of salt if your taco seasoning doesn't have any in it)
In a skillet over medium high heat melt the butter.
Then add the taco meat and warm through, about 2 minutes.
Then pour the egg mixture over the top and scramble the eggs with the meat.
Then top with your cheese and mix in to melt.
Flatten your eggs to get the cheese crispy. Flatten and wait 1-2 minutes and then flip to crisp the other side.
Serve with your favorite topping!
I love salsa and sour cream with some chopped, pickled jalapeños! Enjoy!
Another amazing meal prep for any meal of the day right here. I am all about meal prepping for a few hours on Sundays so I can stay on track during the week. Don't get me wrong, I love cooking but with the fast pace of life these days I am so thankful when I can pull something already prepped out of the fridge, heat it up, enjoy it and then get back to life. Eating on the go and meal prep doesn't have to be tasteless and blah though- don't forget that! You can have a delicious meal waiting for you- you just have to choose the right recipes and give yourself options. This recipe is perfect for any meal of the day. Why? Well, I will tell ya! It is a recipe for all the flavors of an Italian Cheesesteak but they are packed into a frittata that you can take on the go and stay on track with a low carb lifestyle. If you're not a fan of frittatas then you could also put these into muffin cups and enjoy then that way. I also have a lot of people say they are not a fan of reheated (or any) egg. Well I hear ya and I agree HA! That is why I fill my frittatas and egg cups with a lot to the filler and really only have the egg as the binder that keeps everything together. I hope you love this one because we definitely do!!!
Italian Sandwich Frittata- Makes 5 servings
7 eggs
2 Tbsp half and half OR heavy cream
10 oz Steak Umms meat, cooked
5oz fresh mozzarella cheese
1/4 cup banana peppers
4 Tbsp pizza sauce, plus more for dipping- I use Raos
Salt and Pepper to taste
Preheat the oven to 425 degrees.
Then in a medium skillet cook the steak umms meat until it is all browned and no longer pink.
VERY important- drain the meat well. You can even remove to a paper towel to soak up some of the residual grease.
Whisk together the eggs, half and half, and a sprinkle of salt and pepper.
Spray a 9 inch pie plate with cooking spray and layer in the cooked meat and banana peppers. Then pour the egg mixture over.
Slice the mozzarella and top the frittata evenly. Using a fork submerge each slice of cheese into the egg so it is well coated.
Then top with the pizza sauce.
Bake for 25 minutes.
Allow to rest for at least 3 minutes before you serve. If you are meal prepping allow it to cool slightly and then package up with extra pizza sauce for dipping on the side. Enjoy!
The easiest meal prep with the tastiest flavor! Isn't it the best feeling when you know you have a delicious lunch waiting for you while you're at work or you have a quick meal you can heat up on the go or while you're home? I am always looking forward to my next meal so when I know I have some fajita chicken in the fridge, I'm a happy girl! This is not authentic and it's definitely just following the directions on the seasoning packet BUT I have a few ways to make this perfect and I hope you add it to your meal prep really soon. Fajita Chicken- Makes 4 servings
1 lb chicken breast cut into thin, small pieces
1 cup of bell pepper sliced thin
1 cup of white onion cut into thin half moons or diced
1 packet of Fajita Seasoning or 1/3 cup of homemade Fajita Seasoning
1/3 cup water
2 Tbsp olive oil
Heat the olive oil in a large skillet over medium high heat.
Once the oil is very hot add in the chicken. Spread to a single layer.
Allow the chicken to cook for 3 minutes.
Flip chicken pieces over to cook an additional 2-3 minutes until cooked through.
Remove the chicken to a plate and set aside making sure to reserve the oil in the pan.
There should be 1 tbsp of oil still in the pan, add more if needed.
Over medium high heat add in the onions and the peppers.
Cook them for 10 minutes, stirring occasionally until the vegetables are soft and well browned.
Add the chicken back in and turn down the heat to medium.
Sprinkle the fajita seasoning over the chicken and the veggies. Give everything a good mix.
Add in the water and stir well.
Allow to bubble and thicken for 1-2 minutes.
Then you are ready to serve! Enjoy!
Craving pizza again? Ya, me too. LOL
Don't derail your diet journey- just make these eggplant pizzas instead! You might already have all the ingredients on hand! If you think you might not like this recipe for whatever reason- eggplant skin, small portion, thick cut eggplant.... just make it and thank me later. If you follow my directions for this one I promise you'll love it. Oh yea and I didn't invent this. It's a recipe that's all over the internet. BUT I think I've cracked the code to making them taste amazing every time! I hope you love em too!
Eggplant Pizzas- 1 Serving
4 slices of eggplant- cut 1/2 inch thick (about 7 ounces total)
2 Tbsp marinara sauce
4 Tbsp shredded mozzarella cheese
1/2 Tbsp extra virgin olive oil
garlic powder
onion powder
Italian seasoning
Salt
Pepper
chopped parsley for garnish
Preheat the oven to 350 degrees.
Line a baking sheet with tin foil and lightly spray with cooking spray.
lay the eggplant circles on the baking tray and brush with olive oil then sprinkle with salt, pepper, onion powder, garlic powder and Italian seasoning. Flip the eggplant and brush with olive oil and season the other side with spices.
Bake for 18 minutes.
After they are finished remove from the oven and top with 1/2 Tbsp each of marinara sauce and then 1 Tbsp each of mozzarella cheese.
Broil for 4 minutes but watch them closely so they don't burn. Depending on your oven you might need more or less time.
Top with some chopped parsley and ENJOY!
It is very seldom that I hear my husband crave a meal prep two weeks in a row... but folks, this was a recipe he wanted to have for his breakfast at work not just one week but two weeks in a row. I bring you my Savory Broccoli & Bacon frittata! featuring smoked gruyere cheese, dried thyme and nutmeg. This frittata is perfect for any meal- it is perfection for meal prep- just make it and then me later. Normally I would say use whatever ingredients you like and have however, this time I urge you to make it exactly as it is written. Each ingredient is necessary and all the ingredients together build such a tremendous flavor profile I wouldn't want you to switch it up and be disappointed. I hope you enjoy and by the way- what a perfect edition this would be to your Fathers Day brunch!
Savory Broccoli & Bacon Frittata- Serves 5
1 cup broccoli florets, chopped into bite size pieces
6 slices of cooked bacon, broken into bitesize bits
1/2 cup thinly slices onion
1 Tbsp finely chopped (or grated) garlic
1/2 cup smoked gruyere cheese
1/4 tsp dried thyme
1/8 tsp nutmeg
7 eggs
2 Tbsp half and half
Salt and Pepper to taste
Preheat the oven to 425 degrees
Combine the egg, half and half, dried thyme, and nutmeg. Add in a pinch of salt and pepper.
Whisk until well combined. Set aside.
Grease a 9 inch pie plate with cooking spray.
Layer in the onions, garlic, broccoli, and bacon.
Pour the egg mixture over the veggies. Make sure to coat the mixture in the egg.
Top with the gruyere cheese.
Bake for 25 minutes.
Let sit for about 5 minutes before serving.
If you are making this dish for meal prep I would advise to let it cool for about 15 minutes then cut it into portions and keep refrigerated until you are ready to eat. ENJOY!
Get ready for my favorite recipe of the moment! Every single ingredient in this dish is on my favorites list. You've got your cheese, chicken, and of course garlic n butttta. SO. GOOD. If I was telling you about this recipe in person I would probably say "I cant even..." because I say that for everything in life that is phenomenal and amazing. I cant even- because I cant even believe I'm eating this and it is low carb. Please try it and let me know how much you love it too! Notes about this recipe- I didn't use pasta- I used zucchini noodles BUT You could totally use any kind of pasta or veggie noodle of your choice and the dish would be just as amazing. *If you need more servings just multiple by how many people you need to feed! It's that easy! *Red pepper flake is optional but oh so tasty. The amount in this recipe will give you a subtle burn at the end of each bite. *The amount of garlic I used is how much I like and I love garlic. Use a little less if you're not as big of a fan.
Low Carb Garlic Butter Pasta- Serves 1
1 Tbsp extra virgin olive oil
1 Tbsp unsalted butter- divided in half (I use Kerrygold)
1 1/2 Tbsp chopped garlic
3 oz cooked chicken, cut into bite size pieces (I used grilled chicken I had prepped but you could use rotisserie too)
2 cups zucchini noodles (Or 2 cups of any pasta you would like)
1 oz fresh mozzarella
1/4 tsp red pepper flake (optional)
Pinch of dried oregano
Parmesan cheese for topping
In a large skillet add the olive oil and 1/2 tbsp of butter. Then turn on the heat to medium.
Immediately after turning the heat on add the garlic and red pepper flake. (By adding it now the flavor of the garlic and pepper flake will infuse into the butter and oil)
Within a minute everything will begin to bubble. Then add in the chopped, cooked chicken.
Stir everything and allow the chicken to warm for about 30 seconds.
Next, add the zucchini noodles. Sprinkle with a pinch of oregano and some salt and pepper to taste.
Stir everything together and allow to warm through for 30 more seconds.
Then top the mixture with the mozzarella cheese and cover for 3 minutes.
Top with some parmesan cheese and you are ready to go! Enjoy!
It's here...!! My Summer Chicken Bowl recipe is finally ready to be viewed by the world. I have been making this for J's lunch prep for awhile now and when a meal is husband approved I feel like then you know-- it's ready to be shared. But really, this recipe is super easy and quick. I don't know about you but when I meal prep there are times when I feel like spending hours in the kitchen and really cooking... but then there are other times... those other times I know I have to meal prep but I really don't want to and I do it because I have to... well if you're also like me and wanna get in and out of the kitchen then make this easy chicken bowl and get back out and enjoy this amazing Summer while we still have it! Before we know it its going to be Fall and we are going to be into comfort food weather... and you better stay tuned because I have a ton of comfort food recipes up my sleeve!
Summer Chicken Bowl- Makes 1
1 cup baby spinach
8 mozzarella pearls
1 Tbsp pesto
pinch of red pepper flakes (optional)
1 cup cooked chicken, shredded or diced
2 Tbsp finely grated parmesan cheese
1/4 tsp garlic powder
1/4 tsp dried oregano
1/4 tsp dried basil
8 cherry tomatoes (mine were equivalent to 2.5oz)
You will also need some olive oil and salt and pepper.
To start chop or shred your cooked chicken. In a small bowl combine chicken, parmesan cheese, garlic powder, basil, and oregano. Mix well until the cheese is incorporated with the chicken. Set aside
Next, prep the mozzarella- cut balls into smaller pieces if desired and mix well with pesto and a pinch of red pepper flake, set aside.
Next, cook the tomatoes. You can roast these in the oven or if you are impatient like me you can "roast" the tomatoes in a small sauce pan. Heat your pan over medium high heat with a small drizzle of olive oil. Add in your tomatoes along with a pinch of salt and a pinch of pepper. Shake the pan to cook the tomatoes on all sides until they are as blistered as you like. (see video above for reference)
Then it's time to assemble the bowls. I like to add in my spinach and then pile on the chicken, mozzarella, and tomatoes right on top. *To enjoy this bowl cold just top with a drizzle of balsamic glaze or make a simple vinaigrette using olive oil and balsamic vinegar. *If you are going to enjoy it warm then store the mozzarella separately until you are ready to eat. Microwave until warm and add mozzarella on top. Add balsamic glaze or vinaigrette and Enjoy!
Nutritional information for entire recipe (not including any dressing)
I am a few days from 26 weeks pregnant and all I have been craving lately is some lunch meat. I've been dreaming of it. A juicy roast beef sandwich in particular with white American cheese (don't ask me why but it has to be white not yellow LOL), lettuce, tomato and plenty of mayo. Holy... my mouth is watering! They say woman who are pregnant should avoid lunch meat due to the possibility of listeria poisoning. Now, I know a lot of pregnant woman eat lunch meat and are totally fine but this is just one of those things I don't want to mess with. Until today when I make my own homemade roast beef!
There are 2 ways to approach cooking your own roast beef. 1. high heat and quicker cooking time or 2. low and slow.
This recipe is going to be for the low and slow version. I want my roast beef to not have the crust that you would get from cooking it at a higher temperature for less time because I'm going to be making sandwiches or wraps and don't need the crust. Both versions will be on my blog eventually but for today we have the low and slow version. Let's begin!
Homemade Roast Beef
1 top round Beef Roast 2- 2 1/2 lbs (in the video mine is 2.37lb)
1 1/4 tsp salt
1 tsp pepper
1 tsp garlic powder
1 tsp onion powder
1/2 tsp dried thyme
Preheat the oven to 225 degrees F.
Rinse and pat the roast dry.
Mix together all the spices. Rub the spices all over the roast. Press the slices into the meat as best as you can.
Place in a roasting pan (or on a foil lined baking sheet) in the oven until the center has reached your desired doneness (see the temperature guide below).
I cooked mine until 135 degrees. This took 2 1/2 hours.
Use a meat thermometer or digital meat probe to determine the temperature.
Once the beef is done cooking allow it to rest for 20 minutes. After that you can slice it and eat it warm or you can follow what I did in the video above- Allow the beef to cool then wrap in parchment paper and plastic wrap and refrigerate overnight.
The next day slice against the grain as thin as possible using a sharp cerated knife or a meat slicer.
Store in the fridge for up to 5 days - if it lasts that long! Enjoy!
Temperature Guide:
120 degrees Rare
126 degrees Medium Rare
134 degrees Medium
150 degrees Medium Well
160 degrees Well Done
*Ways to use this roast beef*
-Sandwiches
-Wraps
-Lettuce Cups
-Make a Steak Salad (romaine, gorgonzola, roast beef and balsamic dressing)
-Serve Warm with Gravy
-Make Roll-Ups with Cheese and Mayo
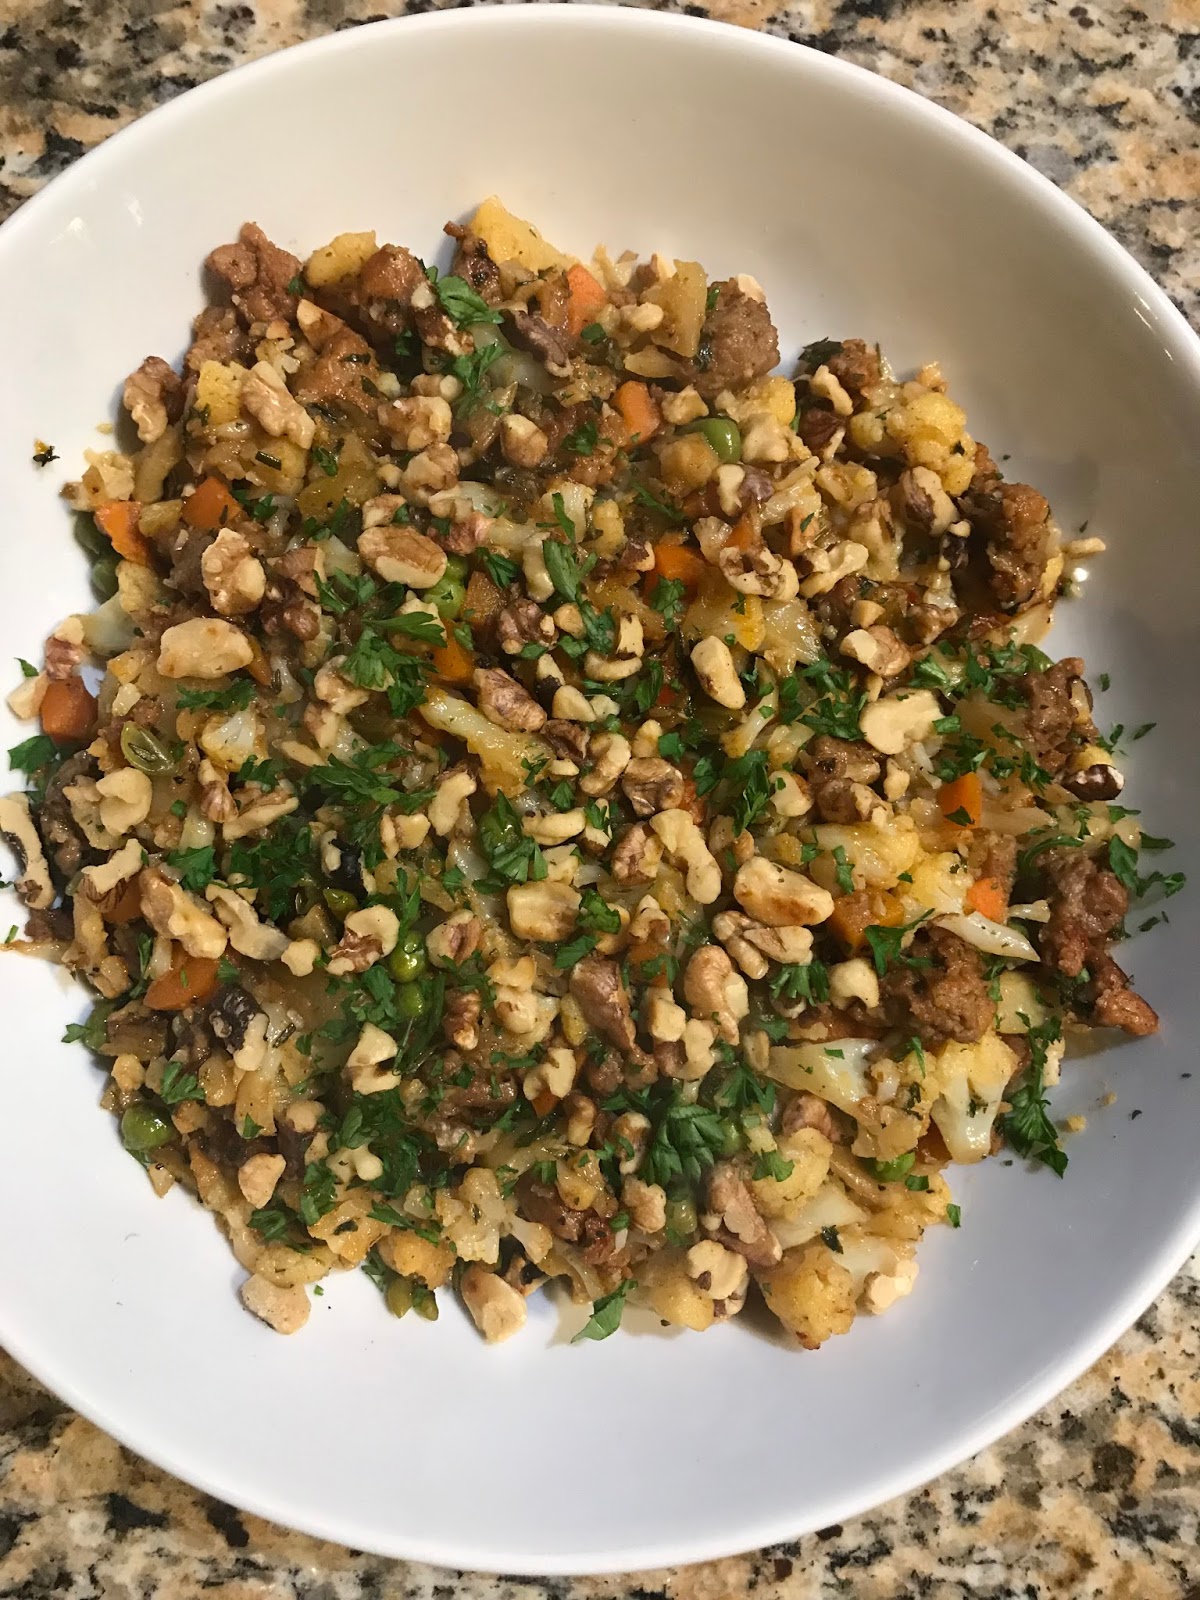
Just in time for Thanksgiving! Let me just say- I worked hard on this recipe because I wanted it to be perfect and I am beyond proud to say I think this is just about one of the best ever on my blog. Not only is it an amazing side dish BUT it can also be a great make ahead lunch or dinner for any time of the year. The ingredients are reminiscent of a comfort food classic that you can enjoy with your family and friends for the holidays or as a meal prep lunch at your desk. No matter how you decide to enjoy this one- make it. You will literally be in love... like I am right now... eating this as I am typing. *Bliss*
lil carb Sausage & Cauliflower Stuffing- Serves 8 as a side dish 3 Tbsp butter
1/2 cup onion, chopped
1/2 cup celery, chopped
2 cloves garlic, minced
5 cups cauliflower (about one medium head), chopped
2 Tbsp fresh parsley, chopped - Plus extra for garnishing
1/2 Tbsp fresh sage leaves, chopped
1 Tbsp fresh rosemary, chopped
1/2 lb ground Italian sausage, mild/sweet or hot (I used a combo of both!)
1 cup frozen peas and carrots
3/4 cup chicken or vegetable stock
1/2 cup chopped, toasted walnuts
In a skillet with high sides melt the butter over medium high heat.
Saute the onions and celery for 3 minutes.
Add in the ground sausage and cook for another 4 minutes breaking up the sausage as it cooks.
Next, add the chopped garlic and stir for 30 seconds until the garlic becomes fragrant.
Add in the cauliflower with a pinch of salt and pepper.
Turn the heat down to medium heat.
Cook, stirring occasionally for 8 minutes.
Then add in the rosemary, sage, and parsley along with the frozen peas and carrots.
Stir until mixed well.
Then, add the chicken stock to the pan and scrap the flavorful bits off the bottom of the pan.
Cover with a lid and allow to cook for 15 minutes or until all of your liquid has absorbed, stirring every couple minutes.
Then transfer to a serving bowl and top with toasted walnuts and some more chopped parsley. Enjoy!
*Recipe makes 8 - 1/2 cup servings as a side dish for the holidays*
Here we go again everyone! Meal prep is my best friend I swear. I love to cook, don't get me wrong butttt- how awesome is it when you have a perfectly cooked meal waiting for you all portioned out in the fridge that you can heat up and eat? This meal fits the bill! Easy, delicious and-as always- LOW CARB!
*For this recipe I weighed my ingredients because the sizes of vegetables vary greatly depending on where you purchase them and at what time of the year you are purchasing them. I hope this helps you.
I have a small little kitchen scale that really helps me out if you don't already have one- here's the one I USE. Super affordable and I use it ALL the time.
Balsamic Chicken & Veggies- Makes 4 servings
16 oz chicken breast, cut into cubes
12 asparagus spears, woody ends snapped off
5.5 oz red onion (about 1/2 a large onion)
7 oz zucchini (1 medium size zucchini)
6 oz red bell pepper (1 medium sized pepper)
12 oz cauliflower (1/2 medium head)
3 oz baby bella mushrooms (about 7 mushrooms)
3 Tbsp olive oil, divided
3 Tbsp balsamic vinegar
1 tsp garlic powder
1 tsp Italian seasoning
Salt and Pepper
Preheat your oven to 450 degrees.
Take a large baking sheet and cover it in tin foil and set aside.
To your chicken that has been cut into cubes add 1 Tbsp of the olive oil, the garlic powder, Italian seasoning and a pinch of salt and a pinch of pepper. Mix together well until all the chicken is coated and set aside.
Cut up all of your vegetables into large chunks- try to keep the vegetables cut at the same size this will help cook everything evenly.
Arrange the vegetables on the foil lined baking sheet and pour on the remaining 2 Tbsp of olive oil and 3 Tbsp of balsamic vinegar. Sprinkle with salt and pepper and then give a good mix to make sure all the veggies are coated.
Next, nestle the chicken cubes right on top of the veggies.
Bake for 20-25 minutes (I baked mine for 23 minutes)- to test to see if it is done cut into the biggest piece of chicken and if it is cooked through then you are done!
Serve this right away or allow it cool and then pack it up into some tuber ware and store it in the fridge for meal prep. Any way you eat it- ENJOY!
If you're ready for a new lunch idea then keep reading!
Switch up your daily salad for my chicken salad lettuce cups! Crunchy lettuce, creamy cheese, salty bacon, sweet tomato.... I cover all the textures which makes these lettuce cups so perfect! I like to meal prep these to take for lunch because they hold up really well in my lunch box!
Try them today!
lil carb chicken Salad Lettuce Cups-Serves 1
1/2 cup Chicken Salad (get my recipe below!)
2 lettuce cups (see video for how I make mine)
2 slices of tomato
2 slices of cooked bacon
1 slice of American cheese
To assemble add 1/4 cup of chicken salad to each of your lettuce cups.
Then top each with one slice of bacon, one slice of tomato, 1/2 slice of cheese and ENJOY!
Nutritional Info
For one serving above:
525 Calories
32 Grams Protein
4.3 Grams Net Carbs
My Chicken Salad Recipe- Makes 2 cups
2 cups rotisserie chicken, shredded or chopped
1/3 Cup Mayo
1/4 Cup chopped onion, red or white
1/4 tsp Salt
1/2 tsp Pepper
Combine all the ingredients together, mix well and store in the fridge!
One pan, short ingredient list, and So.Much.FLAVA!
This meal is great for a quick and easy dinner as well as meal prep.
I absolutely LOVE taking this for lunch the next day.
lil carb Sausage Peppers and Onion Noodles- Serves 4
3/4 lb Italian sausage (ground OR in links)
1 medium onion, roughly chopped
1 bell pepper, roughly chopped
2 cups of zucchini noodles
2 tsp olive oil, divided
1 1/2 cups low carb marinara sauce
1/2 cup water
Salt & Pepper to taste
1/2 tbsp fresh parsley for garnish (optional)
1. Ground Sausage: In a large skillet (mine is 12 inches) add in 1 tsp of olive oil over medium high heat and cook your ground sausage until fully cooked. Then remove with a slotted spoon to a plate and return the pan back to the stove and continue on to step 2.
1. Sausage Links: poke your links with a knife 3 times so they don't explode in the oven and bake at 425 degrees for 25-30 minutes. Let sit to rest for about 3 minutes then slice and set aside.
---
2. To your pan add in 1 tsp more of olive oil over medium heat. Add in the onion and pepper and sauté for 5 minutes until the vegetables are soft and just starting to get brown. If you used ground sausage make sure to leave the brown bits in the bottom of the pan. Brown bits= FLAVOR!
3. Add the sausage back in to the pan and then add in the marinara sauce and the water and mix well.
Turn up the heat to medium high and using your spatula to release the brown bits from the bottom of the pan. Let this bubble away, stirring often, for 5 minutes. Taste and add salt and pepper if needed.
4. Next, add in your zucchini noodles and stir well for 1 more minute.
(without dressing, using the ingredients I used in my video)
472 Calories
25 Grams Protein
12.5 Grams Net Carbs
So.. at first I thought that getting bored with the same old foods was a bad thing. But after I started thinking about it I realized it's a GREAT thing! By getting bored of foods it is keeping my mind sharp and forcing me to create yummy new recipes and put together new ideas. This next recipe was born in exactly that way. I was sick of the same old lunch salads I was eating and when I get sick of food I get sad. I really really love food and food should be an experience! Even if you're eating in your cubicle at work. You should still look forward to lunch. With this salad I get excited for lunch to come!!! Is it 12:01 yet? hehehe
lil carb Italian Sub Chopped Salad-
Serves 1 as a meal salad or 4 as a side salad
2 1/2 cup lettuce blend
2 Tbsp grated parmesan cheese
1/4 cup mozzarella cheese- use fresh, grated, or mozzarella balls (see video)
1/4 cup cucumber
8 Kalamata olives
2 Tbsp roasted red peppers
1/4 cup yellow bell pepper
2 Tbsp red onion
5 cherry tomatoes
5 slices pepperoni
1 1/2 oz salami
1/4 tsp dried oregano
Break apart lettuce leaves with your fingers into bite size pieces.
Then chop up everything else! Its that easy.
I like to combine in a big bowl then sprinkle with oregano and give a good mix with your favorite Italian dressing! My favorite is Kens Italian!
Pack this up for lunch, serve it as a side salad with your favorite dinner or enjoy right on the spot after you chop chop and drop! Enjoy!
Pizza is one of those foods that can be really hard to replicate but with around 30 grams of carbs for ONE slice of pizzeria pizza I had to figure it out. I have tried all different low carb versions and they all were flops. Cauliflower crust sounds promising but the fact that you will never have a crispy crust is where you lose me. Same with a lot of pre-packaged crusts. Extra money and extra ingredients that I couldn't pronounce. I had almost given up on finding a low carb pizza that would rival actual pizza until one day when I was craving pizza soooo bad and I looked in my pantry, saw my Tumaros wraps and knew I had to give it a shot. That is when this recipe was born and now I have the perfect go-to, low carb pizza and it is truly amazing! I cannot stress enough how important it is for everyone to try this recipe. Especially if you are watching your carbs- especially if you love pizza as much as I do- this recipe is a game changer!
lil carb Personal Pepperoni Pizza- Serves 1
1 - 8 inch low carb wrap- Click HERE to see the ones I use
2 Tbsp low carb marinara OR pizza sauce - I use Raos Brand
No drooping pizza crust here!!!
12 slices pepperoni
1 Tbsp grated parmesan cheese
2/3 cup grated mozzarella cheese
Pinch of dried oregano
pinch or two of crushed red pepper flake
pinch of garlic salt
Preheat the oven to 450 degrees.
Place the wrap on a baking sheet and evenly spread the sauce covering the entire wrap in a thin layer.
Lay down the pepperoni slices in a single layer.
Sprinkle with the oregano, red pepper, and garlic salt.
Sprinkle next with the parmesan cheese followed by the mozzarella cheese.
Bake for 10 minutes.
Let cool for a minute then cut using a pizza cutter ENJOY!
and
Prepping my meals ahead of time- especially lunch - is critical to my low carb lifestyle success.
The best feeling is waking up and being able to grab a salad I already prepped so I can be out the door and off to work in no time.
I have a few go-to salads and this is the first one in my easy lunch salad prep series. So stay tuned for more delicious salad ideas!
lil carb Cheddar Bacon Ranch Salad- Serves 1
2 cups your favorite lettuce blend, I use THIS ONE 2 Tbsp shredded cheddar
1/4 cup chopped cucumber
1/8 cup chopped red pepper
1 green onion, sliced thin
2 strips of cooked bacon, broken into bite size pieces
1 hard boiled egg
Ranch Dressing- I use Hidden Valley Original Ranch
Garlic & Sea Salt-optional-
Combine all of your ingredients in a tuber ware.
Put the dressing in a separate tuber ware and refrigerate until you are ready to eat! ENJOY!
Per salad including 2 Tbsp dressing:
386 Calories
16.8 grams Protein
8 net grams Carbs
*The calorie, carb and protein calculations are for the exact products I use.
Remember to check your labels! *