Showing posts with label Beef. Show all posts

Tuesday, September 1, 2020

Cheeseburger Quesadilla - Low Carb & Keto Friendly!


Craving fast food but all of a sudden I'm mad I can't have the bun... LOL I have reached that point in my life. Since I'm sticking to my weightloss goals I needed to find a way to recreate these fast food flavors at home and make it so delicious that I didn't feel deprived. And now we have the Cheeseburger Quesadilla. If you are keeping this Keto and Low Carb friendly the ingredients really matter. I used low carb wraps by Ole and I use low sugar ketchup and I only use a tiny bit. Check out the links below. If you try this one make sure to tag me on social media (Instagram @lil_piece_of_hart). Check out the video above for a tutorial on how I made these... and then once you're done with the video MAKE THEM! You will not be sorry!

Cheeseburger Quesadilla- Makes 1

1/4 lb ground beef
2 slices of cheese (I used American)
1 1/2 Tbsp chopped white onion 
5 dill pickle slices
1 wraps of your choice (My Fav)
1/2 Tbsp yellow mustard
1/2 Tbsp low sugar ketchup (Why I use Heintz)
1 tsp extra virgin olive oil
salt and pepper
small pat of butter 


Heat a heavy skillet (I used my cast iron) on high heat and add in the olive oil. Allow to get very hot and then add in your ground beef. Flatten with a spatula to make one big patty. Season with salt and pepper.  Allow to cook until a crispy crust has formed. Flip, season the other side with salt and pepper and then once it is cooked through, transfer to a plate. 

For this next step of making the quesadillas I used my nonstick skillet. 

Heat skillet over medium heat and rub the butter on the bottom of the skillet in a thin coating. Place a tortilla in the skillet and add in one piece of American cheese onto one side of the tortilla. Then add in half of the meat, cutting the meat to fill one side of the tortilla. 

Top with onion, mustard, and ketchup Then add 5 pickle slices and the other slice of cheese. 

Fold the wrap over and cook for another 30 seconds or so until the bottom of the tortilla is browned. Then flip over and cook an additional 30 seconds to a minute until the cheese has melted and the bottom of the tortilla is browned. 

Remove from the heat, cut into wedges or halves and ENJOY!


Nutritional Facts Per Quesadilla 
(using the exact ingredients I used)
387 Calories 
34 grams of protein
21 grams of carbs
12 grams of fiber
9 Net Carbs


Tuesday, November 12, 2019

LOW CARB Taco Eggs


If you are a taco lover like myself, you will absolutely love this dish. I make tacos a lot for dinner which means I always have leftover taco meat. This is one of my favorite ways to use it up and make a filling, low carb meal! I say meal by the way because I eat this for breakfast, lunch OR even dinner! Whenever the craving hits! The best part is you can use your favorite cheese, your favorite salsa, or even add queso or guacamole or whatever toppings are your favorite!

Taco Eggs- Serves 1 
1/4-1/3 cup leftover taco meat (beef, chicken, or turkey seasoned with Taco Seasoning)
1 egg
1/2 Tbsp butter
1 Tbsp half and half
1/4 tsp Taco Seasoning
1/4 cup of your favorite cheese (I use a Mexican cheese blend)
Plus any toppings you choose!

In a bowl whisk together the egg, half and half and 1/4 tsp taco seasoning and set aside (add a pinch of salt if your taco seasoning doesn't have any in it)
In a skillet over medium high heat melt the butter.
Then add the taco meat and warm through, about 2 minutes.
Then pour the egg mixture over the top and scramble the eggs with the meat.
Then top with your cheese and mix in to melt.
Flatten your eggs to get the cheese crispy. Flatten and wait 1-2 minutes and then flip to crisp the other side.
Serve with your favorite topping!
I love salsa and sour cream with some chopped, pickled jalapeños! 
Enjoy!


Tuesday, July 23, 2019

Italian Sandwich Frittata LOW CARB

Another amazing meal prep for any meal of the day right here. I am all about meal prepping for a few hours on Sundays so I can stay on track during the week. Don't get me wrong, I love cooking but with the fast pace of life these days I am so thankful when I can pull something already prepped out of the fridge, heat it up, enjoy it and then get back to life.  Eating on the go and meal prep doesn't have to be tasteless and blah though- don't forget that! You can have a delicious meal waiting for you- you just have to choose the right recipes and give yourself options. This recipe is perfect for any meal of the day. Why? Well, I will tell ya! It is a recipe for all the flavors of an Italian Cheesesteak but they are packed into a frittata that you can take on the go and stay on track with a low carb lifestyle. If you're not a fan of frittatas then you could also put these into muffin cups and enjoy then that way. I also have a lot of people say they are not a fan of reheated (or any) egg. Well I hear ya and I agree HA! That is why I fill my frittatas and egg cups with a lot to the filler and really only have the egg as the binder that keeps everything together. I hope you love this one because we definitely do!!!

Italian Sandwich Frittata- Makes 5 servings
7 eggs
2 Tbsp half and half OR heavy cream
10 oz Steak Umms meat, cooked
5oz fresh mozzarella cheese
1/4 cup banana peppers
4 Tbsp pizza sauce, plus more for dipping- I use Raos
Salt and Pepper to taste

Preheat the oven to 425 degrees.
Then in a medium skillet cook the steak umms meat until it is all browned and no longer pink.
VERY important- drain the meat well. You can even remove to a paper towel to soak up some of the residual grease.
Whisk together the eggs, half and half, and a sprinkle of salt and pepper.
Spray a 9 inch pie plate with cooking spray and layer in the cooked meat and banana peppers. Then pour the egg mixture over.
Slice the mozzarella and top the frittata evenly. Using a fork submerge each slice of cheese into the egg so it is well coated.
Then top with the pizza sauce.
Bake for 25 minutes.
Allow to rest for at least 3 minutes before you serve. If you are meal prepping allow it to cool slightly and then package up with extra pizza sauce for dipping on the side.
Enjoy!

Nutritional Facts Per Serving:
400 calories
23 grams of protein 
2.2 grams of carbs
0 grams of fiber


Thursday, January 11, 2018

lil carb Meatloaf & Roasted Garlic Gravy


I really love meatloaf and I'm totally not afraid to admit it. I have another meatloaf recipe already on my blog for a Bacon Wrapped Meatloaf with Ketchup Topping which is delicious but I also wanted to share a more savory meatloaf recipe with everyone. This recipe is J's favorite. Plus since it has a gravy alongside it goes perfectly with cauliflower mash - get my recipe HERE. If you're looking for another great low carb comfort food dish to add to your rotation definitely try out this one out!

Low Carb Meatloaf & Roasted Garlic Gravy- Serves 4
1 1/3 lb ground beef
1 egg
2 Tbsp heavy cream
1/8 cup panko bread crumbs
1/4 cup fine parmesan cheese
1/2 onion- sautéed in 1 tsp olive oil
1/2 tsp dried thyme
1 tsp dried parsley
Salt & Pepper

Gravy:
1 head garlic
2 cups beef broth
3 Tbsp butter

Preheat your oven to 350 degrees.
In a small pan saute 1/2 of a diced onion in 1 tsp of olive oil over medium high heat until the onion softens and browns a little- about 4 minutes. Set aside to cool.
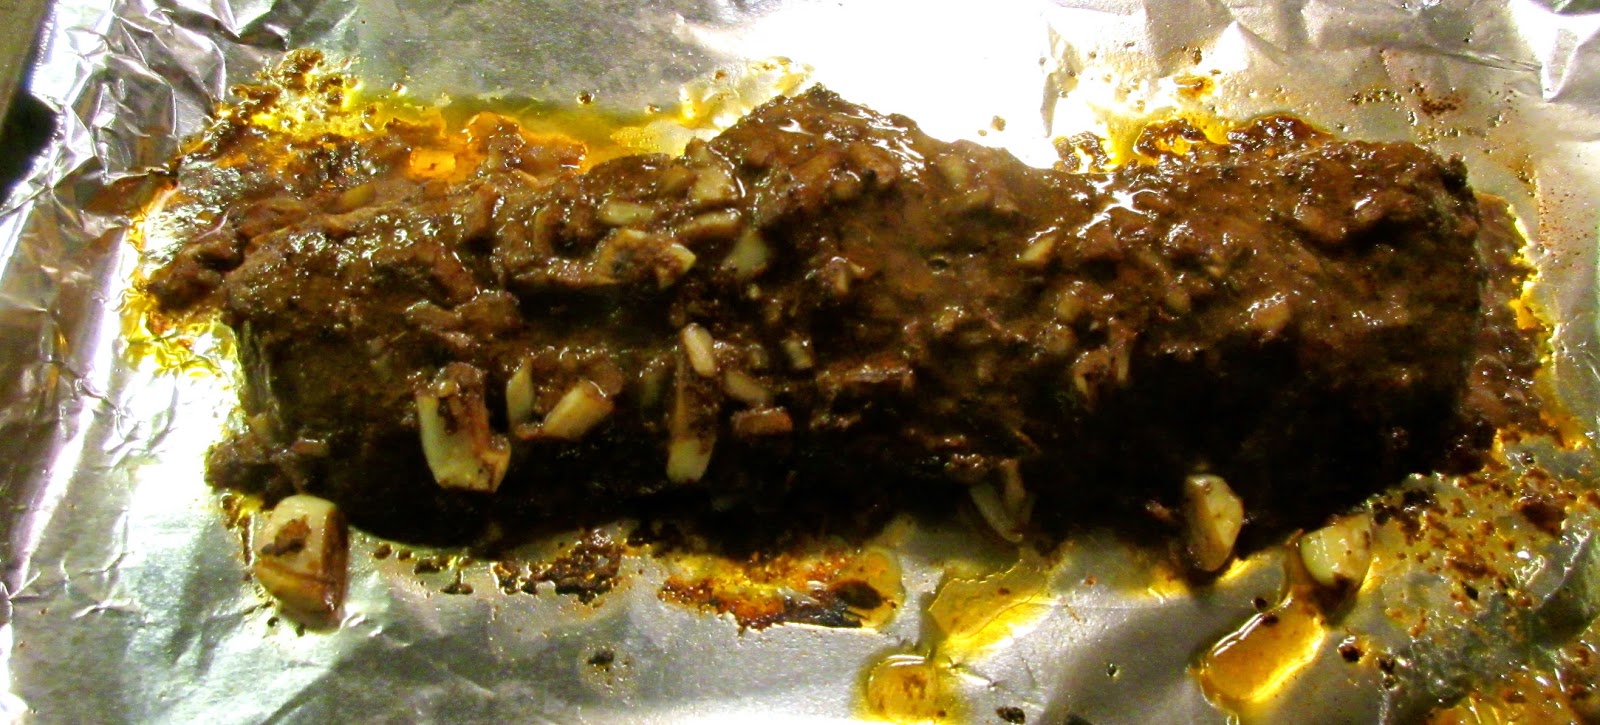
To prep the garlic head- cut top 1/3 off and discard or use for another recipe. The bigger bottom half add to a small piece of tin foil and top with 1 tsp of olive oil and a pinch of salt and pepper. Wrap the foil around the garlic head to make a pouch (see my video above for further instruction). Set this aside for a minute.
Next, assemble the meatloaf. In a large bowl whisk the egg with the panko, parmesan cheese, dried thyme and dried parsley and a pinch of salt and pepper until well combined.
Then add in the heavy cream and the cooked onion and mix again.
With clean hands add in the ground beef and mix until everything is combined but be sure not to over-mix.
Place the meat mixture on a foil lined baking sheet and form into a loaf shape.
Put the foil wrapped garlic head also on the baking sheet and place in the oven for 45 minutes.

For the gravy:
When the meatloaf timer has 20 minutes left bring the beef broth and butter to a rolling boil on medium high heat. Let this reduce down for 20 minutes whisking every few minutes.


Once the meatloaf is done, remove it from the oven and cover with tin foil for 10 minutes allowing it to rest. Unwrap the roasted garlic and add the cloves into the gravy. Turn the heat down to low and mash the garlic cloves in the gravy with a fork breaking them up. Allow the flavors to merry on low heat while the meatloaf rests for 10 minutes- add salt and pepper if needed.

To serve plate up a slice and add some gravy and ENJOY!


Nutritional Info Per Serving 
(Meatloaf and gravy split into 4 servings)
543 Calories
31.8 Grams Protein
3 Net Grams Carbs


Friday, December 29, 2017

How to make Homemade Roast Beef | LOW CARB

I am a few days from 26 weeks pregnant and all I have been craving lately is some lunch meat. I've been dreaming of it. A juicy roast beef sandwich in particular with white American cheese (don't ask me why but it has to be white not yellow LOL), lettuce, tomato and plenty of mayo. Holy... my mouth is watering! They say woman who are pregnant should avoid lunch meat due to the possibility of listeria poisoning. Now, I know a lot of pregnant woman eat lunch meat and are totally fine but this is just one of those things I don't want to mess with. Until today when I make my own homemade roast beef!
There are 2 ways to approach cooking your own roast beef. 1. high heat and quicker cooking time or 2. low and slow.
This recipe is going to be for the low and slow version. I want my roast beef to not have the crust that you would get from cooking it at a higher temperature for less time because I'm going to be making sandwiches or wraps and don't need the crust. Both versions will be on my blog eventually but for today we have the low and slow version. Let's begin!

Homemade Roast Beef
1 top round Beef Roast 2- 2 1/2 lbs (in the video mine is 2.37lb)
1 1/4 tsp salt
1 tsp pepper
1 tsp garlic powder
1 tsp onion powder
1/2 tsp dried thyme

Preheat the oven to 225 degrees F.
Rinse and pat the roast dry.
Mix together all the spices. Rub the spices all over the roast. Press the slices into the meat as best as you can.
Place in a roasting pan (or on a foil lined baking sheet) in the oven until the center has reached your desired doneness (see the temperature guide below).
I cooked mine until 135 degrees. This took 2 1/2 hours.
Use a meat thermometer or digital meat probe to determine the temperature.
Once the beef is done cooking allow it to rest for 20 minutes. After that you can slice it and eat it warm or you can follow what I did in the video above- Allow the beef to cool then wrap in parchment paper and plastic wrap and refrigerate overnight.
The next day slice against the grain as thin as possible using a sharp cerated knife or a meat slicer.
Store in the fridge for up to 5 days - if it lasts that long! Enjoy!

Temperature Guide:
120 degrees Rare
126 degrees Medium Rare
134 degrees Medium
150 degrees Medium Well
160 degrees Well Done

*Ways to use this roast beef*
-Sandwiches
-Wraps
-Lettuce Cups
-Make a Steak Salad (romaine, gorgonzola, roast beef and balsamic dressing)
-Serve Warm with Gravy
-Make Roll-Ups with Cheese and Mayo


Roasting Pan I used in this video

iGrill I used in this video

Cabelas Meat Slicer used in the video

Saturday, September 16, 2017

lil carb Taco Breakfast Pizza


Everyone knows I love my taco dinners but since most of the time it is just Jason and I for dinner we have leftover taco meat. This is just one of the many ways I like to use it so nothing goes to waste! I hope this recipe gives you some inspiration to not only use leftovers in a new way but also opens your mind into the world of breakfast pizzas! If you liked this recipe let me know and I will show you some of my other breakfast pizzas!

lil carb Taco Breakfast Pizza 
Serves 1 or 2 
(Jason can eat a whole one, I can only eat half before I am stuffed!)

2 eggs
1 Tbsp half & half
1/2 cup leftover taco meat
5 slices roma tomato
1/3 cup cheddar cheese
1/2 Tbsp butter
salt & pepper

*Plus toppings of your choice- guacamole, sour cream, taco sauce, etc!

Start by warming your taco meat in the microwave for 1 minute and set aside.
Then whisk 2 eggs with half and half and a pinch of salt and pepper and set aside.

In an 8 inch, non stick skillet melt butter on medium high heat.
Add in the whisked eggs.
To create a perfect egg-pizza-"crust" follow my 3 simple tips (reference my video above too!)
1. Swirl the pan to get the egg moving.
2. Scrape away the egg from the sides.
3. Pull the egg away from the sides allowing the raw egg to get underneath and cook.
Continue to do this until the egg crust is mostly cooked.
Then time to assemble the pizza!
Turn the heat down to medium low and add your taco meat onto your egg "crust".
Arrange tomato slices on top of the taco meat and sprinkle with a little salt and pepper and then sprinkle cheese all over.
Cover and allow the cheese to warm and start to melt.
Remove from the heat and run your spatula around the pans edge to loosen the "pizza".
Plate and top with your favorite taco toppings and ENJOY!


Nutritional Info
(not including additional toppings)

1 whole pizza:
438 Calories
5.6 Grams of Carbs
32.8 Grams of Protein

Half of a pizza:
219 Calories
2.8 Grams of Carbs
16.5 Grams of Protein


Saturday, August 5, 2017

Taco Tuesday! Plus 2 lil carb Shells!

As most of you know I am obsessed with Tacos so I wanted to take you along for the ride on a typical Taco Tuesday in the Hart house!
I even use shells and still keep it a low carb Taco Tuesday!


Product Links!


Other Taco Recipes & Videos you will Love!


Tuesday, March 7, 2017

lil carb Cheesesteak Egg Scramble


Per Serving plus 1 Tbsp spicy ketchup:
647 Calories
36.6 Gram Protein
9 Grams Net Carbs

Like most of my recipes this breakfast came about when I was browsing through my fridge trying to figure out something new to make for Jason besides the normal ole scrambled eggs.  I had left over, thin sliced london broil lunch meat in my fridge and some cheese and veggies and behold- a wonderful, NEW, Low Carb breakfast item was born! This quickly became a favorite in my house, I'm sure you will love it too!

lil carb Cheesesteak Egg Scramble- Serves 1
2 eggs
1 Tbsp half & half
3-4 thin slices london broil OR roast beef
2 1/2 slices American cheese
1/8 cup thin slices white onion
1/4 cup thin sliced bell pepper (any color you prefer)
1/8 tsp salt
1/8 tsp pepper
1/8 tsp garlic powder
2 Tbsp butter

Spicy Ketchup:
2 1/2 Tbsp low sugar ketchup
1/2 tsp mayonnaise
1/2 Tbsp Sriracha

Scramble your 2 eggs with the half and half and set aside.
Mix together the spicy ketchup ingredients in a small bowl and set that aside.
Melt the butter in a nonstick skillet over medium hight heat.
Add in the onion and stir for 2- 3 minutes until they are golden brown.
Add in the bell pepper and stir for another 2 minutes.
Then add in london broil breaking into smaller pieces as you add it to the pan.
Stir.
Then add in the salt, pepper, and garlic powder and stir.
Then add the egg in and scramble until they are your desired consistency. Turn your heat down at this point if  you prefer to cook your eggs "low and slow". If you're like me the eggs will cook within the next minute or so at medium high heat.
Make egg scramble into a thin even layer and top with the cheese.
Turn heat down to low and put a lid on to melt the cheese.
Plate and use spicy ketchup as the condiment. Enjoy!

Saturday, November 26, 2016

lil carb Supreme Pizza Bake

Watch me cook this!!! 

Per Serving:
428 Calories
27g Protein
8g Net Carbs 

Supreme pizza and I used to be besties. Like, I absolutely love supreme pizza. It's a love affair- don't tell Jason. lol. Living in New Jersey for most of my life and now in Pennsylvania (but only 7 minutes away from the Jersey border) gives me the opportunity to have literally the best pizza in the country (in my opinion) and I have eaten my fair share. Believe me. It's almost embarrassing how much pizza I have eaten in my lifetime. The last few years supreme pizza has been a memory for me. Until I decided that I can take those same flavors and same ingredients and incorporate them into a "bake" and let me tell you- this bake is the bomb! It's one of my favorite dinners. Hands down. The bonus to this dish is it feeds up to 8 people. So you can make this for a crowd ORRRR you can totally save the leftovers and have them for dinner and then lunch and snacks and literally any time you would have a slice of pizza. While journey-ing through this low carb lifestyle that I'm on I've come to realize that you might be craving something high carb but you can find alternatives to satisfy those cravings in a low carb way!  That is my whole mission for this blog and my YouTube Channel- which if you haven't checked it out you totally should. The video above is a link to my video of me making this dish so click it, check out my channel and subscribe because I am sticking around to share low carb recipes with everyone to keep you happy, healthy, and on track.  Now- go get in the kitchen and make this low carb Supreme Pizza Bake and satisfy your cravings!

lil carb Supreme Pizza Bake- Serves 8
1 Tbsp extra virgin olive oil
2 1/2 lb spaghetti squash, about 4 cups cooked
1 lb ground beef, I used 90/10
1/2-3/4 lb Italian Sausage (whatever your grocery store has as far as amount)
2 tsp garlic powder
2 tsp onion powder
2 tsp Italian seasoning
1 tsp salt
1 tsp pepper
1/4 tsp red pepper flake (optional)
1 cup red onion, chopped
1 cup green bell pepper, chopped roughly
1/2 cup sliced black olives
30 slices of pepperoni
1 cup white mushrooms, sliced
3 cups mozzarella cheese, grated
17oz marinara OR pizza sauce-- plus more for serving (I use Raos brand- VERY low carb!)
Parmesan Cheese for serving

Preheat your oven to 375 degrees.
In a large skillet on high heat add your olive oil.
Then brown the ground beef and sausage until it is cooked through. Drain off all the fat and return the pan back to the stove.
Lower the heat to medium high and sprinkle on all the spices (onion powder, garlic powder, Italian seasoning, salt and pepper). Stir well allowing all the meat to get coated in the spices and toast for about 30 seconds. Then add in 1/2 cup of the marinara sauce. Turn off the heat and stir in the marinara until everything is well coated.

To assemble the "bake" add in about 1/2 a cup of marinara sauce to your large baking dish ( I use 8X10) and spread it out to cover the bottom in a thin layer.
Next take half of your spaghetti squash noodles and spread them out in a thin layer.
Add another half cup of marinara sauce on top of the spaghetti squash and gently mix to get the "noodles" coated.
The next layer is half of the sausage & beef mixture. Spoon that on in an even layer.
Then, just like making a pizza you add your toppings: take half of your chopped red onion and scatter over the top. Then add the mushrooms in a thin layer followed by the green bell pepper. Take 15 slices of pepperoni and scatter them in an even layer on top. Then take half of the black olives and scatter them on top.
Then take half of the cheese and sprinkle a layer right on top.
Then repeat the same layers one more time:
the rest of the spaghetti squash noodles-->1/2 cup sauce-->the rest of the sausage & beef -->remaining red onion-->remaining mushrooms--->remaining bell pepper-->remaining pepperoni--> remaining black olives-->the rest of the cheese!
Bake for 30 minutes then let it sit for 10 minutes to chill out.
Serve along side some extra sauce and ENJOY!


Saturday, November 5, 2016

lil carb Meatloaf

Watch me make this recipe!


Per Serving- 1 slice of meatloaf and 1 Tbsp of sauce:
3g Net Carbs
22g Protein
226 Calories

Meatloaf... the nostalgic childhood meal that you either love or hate. In my case growing up I always had delicious meatloaf served at my house and I looked forward to those nights!  In my low carb journey I have created my own version of a low carb meatloaf that I know everyone will enjoy. It comes out perfectly every time and it can serve quite a few people, double the recipe and serve even more!  If you think you don't like meatloaf- try mine. Seriously- it is delicious comfort food. But really, what is bad when it's covered in bacon and ketchup?! Not much! So at least I have that working for me! hehe


lil carb Meatloaf- Serves 6
1 Tbsp extra virgin olive oil
1 Tbsp butter
3 cloves garlic, minced
1 medium onion, chopped
1 lb ground beef, I used 90/10
2 eggs, scrambled lightly with a fork
1/8 cup panko breadcrumbs
1 1/2 tsp dried parsley
1 1/2 tsp salt
1 tsp pepper
2 Tbsp low sugar ketchup
1 tsp Worcestershire sauce
5 Slices of bacon, raw

Topping:
2 Tbsp low sugar ketchup

Kats Meatloaf Sauce (6 servings): 
6 Tbsp low sugar ketchup
2 tsp A1 steak sauce

Preheat oven to 350 degrees.
In a small saucepan melt the butter and olive oil and saute the onion and garlic for about 5 minutes over medium heat until they are soft and a little golden brown along the edges.
Remove from the heat and set aside to cool.
Line a large baking sheet with foil and spray lightly with cooking spray. Set that aside as well.

In a large bowl add in the beef, egg, salt, pepper, parsley, ketchup, Worcestershire, and the cooled onion and garlic (plus whatever butter and oil are left in your pan- add it all).
With clean hands mix until everything is just combined.
Put the meatloaf mixture onto your baking sheet and flatten to get rid of any air bubbles then form into your desired shape (watch my video above for further clarification).
Without overlapping, lay the bacon on top of the surface of the meatloaf. I don't like to tuck the ends under but you can if you would like.
Bake for 50-60 minutes. I baked mine in the video above for 60 minutes but all ovens are different.
Spread a thin layer of the topping- 2 tbsp pf low sugar ketchup- right on top.
Bake for an additional 8-10 minutes until the ketchup is a deep red color and caramelized.
Let sit for 10 minutes to cool then add to your platter, slice up, serve with some of my meatloaf sauce on the side and ENJOY!


If you're looking for a low carb side dish to serve this with look to the bar to the left of this post and click on "Side Dish" for some inspiration!

Tuesday, August 9, 2016

lil carb Meat Sauce

Watch me cook this SIMPLE sauce!

I am all for quick, healthy, simple meals using fresh ingredients. And actually- that's the driving force for all of my recipes. This meat sauce, bolognese, whatevs you want to call it fits perfectly in my blog. This meal comes together really quickly but tastes like you were simmering it on the stove for hours. The key is finding a good quality jarred sauce that you love that is low carb OR making your own low carb sauce. A lot of sauces in stores now are locally made with fresh ingredients so if you don't have the time just pick up a jar of sauce! Busy weeknights should not mean unhealthy, un-tasty food. I served this sauce over spaghetti squash noodles but you can take this simple recipe and serve it over some zoodles or even pasta!

lil carb Meat Sauce- Serves 3
1 lb Ground Beef- I use 90/10
1 Tbsp olive oil
1 medium onion, chopped
2-3 cloves of garlic, minced
24 oz of prepared tomato sauce, jarred or homemade
1/2 tsp Italian seasoning
Salt & Pepper, to taste
4 fresh basil leaves, torn

Heat a large skillet with high sides over medium high heat with 1 Tbsp of olive oil.
Brown the meat for about 2 minutes, drain excess fat if needed.
Continue to brown and add in onion and garlic and stir well.
Keep cooking until the meat is fully cooked- about another 2-3 minutes.
Sprinkle with Italian seasoning.
Mix well.
Add in the tomato sauce.
Stir and lower heat to medium heat.
Allow sauce to begin to gently bubble up and warm through but not boil or bubble too much- turn your heat down if that happens.
Taste for salt and pepper.
Right before serving stir in fresh basil leaves.

Click here to learn how to make spaghetti squash noodles!


Thursday, July 21, 2016

lil carb Sloppy Joe Stuffed Peppers

    
Watch my YouTube video on how to make these!


I have yet to find a low carb sloppy joe recipe. Every one that I came across had brown sugar, granulated sugar, or BOTH in the recipe.  This will not do for me because I love me some sloppy joes!  SO... I began recipe testing and you all will flourish in my rewards of this perfect recipe. Dare I say this is the best sloppy joe mixture I've ever tasted?! Well it is.  I stuffed mine into peppers but you could easily take this healthy sloppy joe recipe and add your favorite hamburger bun for the traditional sandwich. SO GOOD- you need to make this asap- it might seems like quite a few ingredients but most of these ingredients I had in my pantry and fridge already- and don't be scared of the steps- I wrote everything out the way I did so that it would be easy to follow.
Get in the kitchen and whip this up tonight!


lil carb Sloppy Joe Stuffed Peppers- Makes 4 peppers
1 lb ground beef, Use 90/10
4 bell peppers, any color you prefer

2 Tbsp olive oil
1 cup chopped onion
1/2 cup diced celery
1/4 cup chopped carrots
3 cloves garlic, chopped

1/4 tsp dried thyme
1/2 tsp paprika
1/8-1/2 tsp cayenne pepper , to taste (optional)
Pinch of allspice
1/2 tsp salt
1 tsp black pepper

1/2 cup low sugar ketchup
2 cups low carb tomato sauce (the cans that say tomato sauce, not marinara sauce)
1 Tbsp Worcestershire sauce
1 Tbsp red wine vinegar

4 oz shredded cheddar cheese
Chopped fresh parsley for garnish
_______________________________________
Start off by preheating your oven to 400 degrees.
Cut off the very top of the peppers with the stem and reserve.
The bottom of the peppers remove the seeds and the cores from the inside.
Put the pepper bottoms in your oven for 8 minutes to soften them up.
Then take them out of the oven and set them aside while you make your sloppy joe filling.

Take the pepper tops and cut around the stem - chop up the good pieces so that you have about 1/2 cup of chopped bell pepper.
Chop all your other veggies and get them done before you heat your skillet.
In a large skillet over medium high heat add in 2 tbsp olive oil.
Then add in your carrots and cook for 2 minutes, stirring frequently.
Then add in the onion, chopped up pepper tops, and celery.
Sprinkle with a pinch of salt and cook, stirring frequently for 8 minutes until the veggies soften. Lower your heat if the veggies start to get dark brown.
Add in the garlic and stir constantly for 1 minutes so the garlic does not burn.
Remove the veggies from the skillet  and put into a small bowl and set aside.
In the same skillet raise the heat to high and cook the ground meat until it is cooked through.
Drain off any excess fat.
Lower the heat back down to medium.
Add the cooked veggies back into the skillet with the ground meat.
Add in the dried thyme, paprika, cayenne (if using), allspice pinch, salt and pepper.
Stir to evenly distribute the spices.
Then add in the red wine vinegar and Worcestershire sauce. Stir well.
Then carefully stir in the ketchup and tomato sauce.
Let this mixture bubble up and cook for 10 minutes on medium heat and it will become nice and thick.
Stir often.
After 10 minutes fill your 4 pepper bottoms with the sloppy joe mixture and top each one with about 2 oz of cheese.
I use a square baking dish to help them stand up and bake at 400 degrees for 6 minutes then pop under the broil for 1-2 minutes until your cheese is brown and bubbly.
Let sit for a few minutes - they will be very hot.
Garnish with some fresh chopped parsley then.....ENJOY!


Tuesday, June 28, 2016

lil carb Steak House Burger & Brussels Sprouts

Watch me cook this whole meal in the link above!

Steak houses are pretty much amazing... cooking steaks at home can be equally as amazing! However, sometimes Jason and I just don't have it in our budget to go to a steak house or to buy $15 steaks for one dinner. But, if anyone knows me- when I have a craving I just gotta have it! In this case when I'm craving that steak I can get the same flavors from this dinner! I like to call this my "Poor Mans Steak Dinner" because you will get all of the flavors without breaking the bank. OMG I just love these kind of recipes! *Smile*

lil Carb Steak House Burger & Brussel Sprouts- Serves 4

Burgers
1 1/3 lb of ground beef
1 Tbsp season salt
4 slices of red onion
4 slices of blue cheese OR 1 cup of crumbles 

Brussel Sprouts
24 medium-large sized brussels sprouts 
2 Tbsp olive oil
1/2 tsp garlic powder
1/2 tsp onion powder
1/2 tsp pepper
1/2 tsp salt
1 Tbsp butter
4 tbsp balsamic glaze 

Preheat oven to 425 degrees.
Cut end off of brussels sprouts and cut in half for medium size and for large brussels sprouts cut them half and then cut each half in half again.
Arrange on a large baking pan covered in foil. (If you're neurotic like me then spray it with cooking spray before you add the veggies hehe)
Drizzle the olive oil all over the brussels sprouts then sprinkle on the garlic powder, onion powder, salt, and pepper.
Toss well with clean hands.
Bake these in the oven for 10 minutes.
Toss well with a spatula.
Bake for another 10 minutes.
Remove from the oven and turn the oven off.
Break up the tablespoon of butter with your hands and scatter across the veggies. Toss one more time and then put them back into the oven to melt the butter and stay warm.

While the brussels sprouts are baking form the beef into 4 oblong burger patties.
Season both sides of the patties with the season salt.
Preheat a grill pan to high or use a skillet on medium high heat. 
Grill for about 5 minutes on the first side. (your stove will vary with mine so adjust your cook time accordingly)
Flip the burgers and top each one with one slice of red onion broken into rings.
Top with the blue cheese slices or 1/4 cup crumbles per burger.
Let cook another 5 minutes on the second side.

To plate- serve your burger along side 1/4 of the brussels sprouts from your baking pan. Top your brussels sprouts with 1 Tbsp of glaze per serving and ENJOY!


Thursday, March 17, 2016

lil carb Meatball Parmesan


Watch me make this amazing dinner!

Italian dishes are some of my favorite dinners to make. However, they are not always low carb friendly.  This recipe has very few carbs and you can enjoy it with just a side salad.  You will never miss the pasta or the bread.  I made this and served it with a caesar salad that included my own homemade dressing that you can find HERE and topped with homemade parmesan crisps!
Even my non-low carb eating family members loved this dinner.
Don't ever think that just because you are living a low carb lifestyle you still can't enjoy your favorite foods.  That is my main blogging-goal: to show everyone that food can be healthy, simple, and totally flavorful all while keeping low on carbs :)  This is a lifestyle that I am trying to make effortless!


lil carb Meatball Parmesan- Makes 20 2-Tbsp scoop meatballs
*Only 2 grams of carbs per meatball!!*

Veggie Prep
1 small onion, minced
2 Tbsp chopped garlic, 4-6 cloves
1 1/2 Tbsp olive oil

Heat a small skillet over medium low heat and melt the olive oil.
Add in the garlic and onion and cook for about 5 minutes until the onion softens and become translucent. Don't let the mixture burn, adjust the heat accordingly depending on your stove.
Once they are softened remove from the heat and let cool slightly.

Making The Meatballs
2 Lb Ground Beef- I used 85/15
2 eggs, slightly beaten with a fork
1 tsp Italian seasoning
1/2 cup Parmesan cheese
1 tsp black pepper
1/2 tsp salt
1/4 cup panko bread crumbs
Butter & Olive oil

Preheat oven to 375 degrees.
In a large bowl add in the parmesan cheese, Italian seasoning, salt, pepper, and bread crumbs and stir to combine. Then add in the egg and mix together. Mixture will form a paste consistency. Then add in the onion and garlic that were cooling in the skillet and mix again. Then with clean hands add in the ground beef and mix until everything is combined- do not over mix. 
In a large skillet melt 1 tbsp oil and 1 tbsp butter over medium heat.
I used a 2 Tbsp scoop and formed the meatballs, rolled them in my hands and dropped them into the skillet to brown on all sides. Once they are browned move them to a paper towel lined plate.
For the second batch I added into the skillet another 1/2 tbsp of butter and 1/2 tbsp oil and added in the rest of my meatballs to brown.
Now... the Parmesan!


Assembling The Parmesan!
1-2 cups tomato sauce plus extra for serving- Homemade or store bought just check the carbs
1 cup parmesan cheese
1 cup mozzarella cheese
Chopped Parsley for garnish

In a large baking dish put 1 cup of sauce to cover the bottom- add more until the whole bottom of your dish is covered.
Add in the meatballs right on top of the sauce. Dont's stack them make sure they all touch the bottom of the baking dish.
Alternate layers of cheese right on top.
Put into a 375 degree oven for 15 minutes.
Finish under the broiler for 2 minutes.
Garnish with parsley and dig in!!


*This recipe makes 20 meatballs but you could certainly cut the recipe right in half and make 10 meatballs! Or double it and make 40!
!ENJOY!


Monday, August 17, 2015

lil carb 15 minute- Taco Chili


Watch me make this recipe!!


I love tacos...more importantly, I know I am not alone. However, low carb means I have to skip out on the shells.  So I thought why not morph these flavors into something else entirely?  My favorite part about tacos in general is that everyones tacos are different.  You can top them with whatever you enjoy most. I love dinners like that!  Another dinner that comes to mind that includes multiple toppings is chili.  So my brain gears started turning and I thought, hey- why not combine the two into a chill bowl filled with taco flavors and assorted toppings?  Well I know you will be thanking me because not only is this an amazing combination of flavors but it can be assembled quick for a really fun dinner experience!  I actually set up a little taco bar for Jason and I when I make this.  I fill bowls with chopped up toppings then as soon as the chili is ready - which only takes about 15 minutes- we can just go right down the line and add to our heaping piles of taco meat goodness with whatever toppings we want!  Even the chili ingredients are customizable to whatever you have or like!

15 Minute Taco Chili: Serves 3-4
1 lb ground meat- You can use beef, chicken, or turkey (however you like your tacos!)
1 bell pepper, diced -any color you prefer
1 onion, diced
1 clove garlic, minced
1 can diced tomatoes with green chilis including the juice
2 cups of kale, shredded into bite size pieces (optional)
1 cup cheese, you can use cheddar, jack, pepper jack, or some store have a "fiesta blend"
Taco Seasoning- make my homemade version here!

To start brown up your meat and pour off the excess grease. Over medium heat add the onion, garlic and pepper to the browned meat. Stir them around for 2-3 minutes until the veggies soften.  Then add in the taco seasoning. I usually add in about 2-3 tablespoons. Mix this around to coat.  Then add in the diced tomato can and then fill the can 1/4 of the way up with water to loosen stuck tomatoes and get the extra juice out of the can and add that to the skillet. Stir this around and let it bubble up for about a minute then add in the kale.  Stir and allow the kale to wilt down.  Once the kale is wilted turn the heat to medium low and top with the cheese.  Cover the pan for another minute until the cheese melts. Then it's ready to serve!  See below for some of my toppings ideas!


Taco Tips:
-Use any kind of ground meat that you have or prefer.  Thats the beauty of this quick chili, it is versatile too!
-I have made this dish with and without the kale.  Surprisingly when I made it without the kale Jason was asking where it was. Believe me, it was shocking! If you do add it, I do recommend that you cut it into bite size pieces that way it doesn't get too stringy. If you don't like kale, use spinach!
-Taco seasoning- once I hade my own I have never purchased it never again. I love making my own spice mixtures. I double the recipe and keep it sealed in a mason jar in my pantry! Get MY RECIPE!
-Now, the cheese... use whatever you prefer! I listed some of my favorites above but it can be whatever you want as long as it's shredded!
-Toppings!!!
More cheese.. yes please!
Black olive slices
Sliced jalapeños
Avocado slices
Taco sauce
Sour Cream
Salsa
Guacamole
Diced raw onion, red or white!
Oyster crackers
Scallions
...Anything your heart desires!


Friday, July 17, 2015

lil carb "Big-Faux-Mac" Burger Sauce

Everyone can grill a burger but what I have found is that it's the toppings that are really the star of the show.  I have even had a picnic that I centered around a "Burger Bar"!  It is so fun to see what everyone creates when given a bunch of toppings.  People always get excited when it's a "make your own something".  And why not?!  It's the time to customize your meal- how fun is that?!  If you ask me it's TONS of fun but I'm a little obsessed with food so I get excited.
One of my favorite types of burgers is the Big Mac from McDonalds. I can still hear the jingle in my head- "...lettuce, sauce, pickles, cheese on a sesame seed bun..." I still crave it to this day even though I haven't allowed myself to have the original for years now.  But I do make a modified low carb version that I think is just as tasty as long as you don't mind skipping the bread.  Although, my special sauce is low carb so if you are going to eat the bread I bet it would be a delicious addition!  Low carb or not this Big Mac knock-off sauce is sure to be a yummy addition to your next burger dinner or burger bar!

Big-Faux-Mac Burger Sauce- Serves 3-4
1/2 cup Mayo
1 1/2 tbsp low or no sugar relish ( I use the brand Mt. Olive)
1 tsp apple cider vinegar
1 tsp yellow mustard
Pinch of salt 
Pinch of pepper
3/4 tsp garlic powder
1/2 tsp onion powder
1/2 tsp paprika

Mix all the ingredients in a small bowl and refrigerate for at least 20 minutes for the flavors to merry. 
Then assemble your burgers!!
To make my version of a Big Mac I used iceberg lettuce as the bun, spread some sauce on the bottom then a topped with a slice of american cheese, the burger, chopped white onion, another slice of cheese, hamburger-pickle slices, more sauce and my top "bun"!

Sunday, July 12, 2015

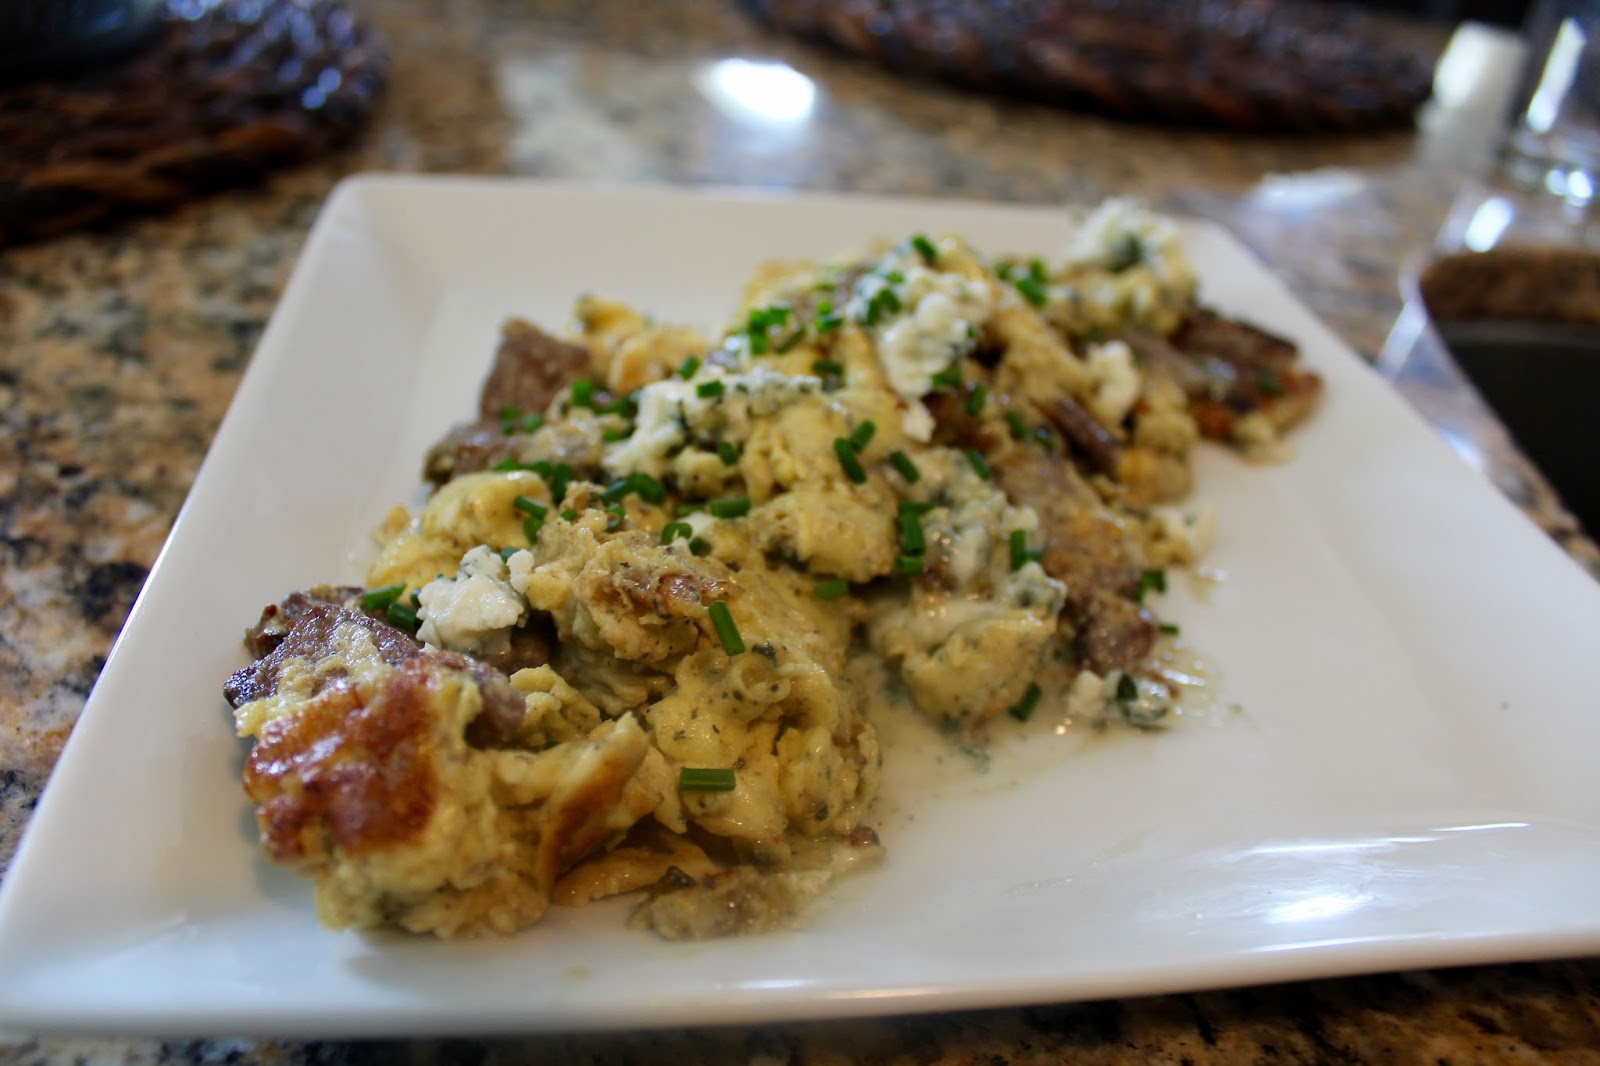
lil carb Steak N Egg-Zola

After a long (too long) hiatus from writing blog posts I am proud to announce that I AM BACK! hehe  The problem was I was being held hostage by my new house. He wouldn't let me stop organizing and unpacking boxes and by the end of the day I was so exhausted I couldn't even manage to keep my eyes open long enough to write a blog post. Not to mention that we have 3 chow chows as you know and we didn't have a fence for 2 weeks! That equals 5:15AM alarm for 2 miles walks to the park followed by working then another walk after dinner!  I now am SO thankful for our gorgeous fenced in yard!  Now that Jason and I are settled in for them most part I am back to share some of the recipes I have been making while I was gone.  I made this recipe for Jason 2 days in a row now and he literally told me I have to share it because it is SO flavorful!  Plus it makes a great use of leftovers. Jason and I just celebrated our brother-in-law Zachs birthday (I love saying that officially! My sister got married in May!- a lot has happened while I was gone!).  We went to a restaurant famous for their steak.  When we go out to eat I usually get excited at appetizer time and never leave enough room for my full steak so I usually take it home.  ALWAYS take steak home!  There are plenty of ways to enjoy it after the initial meal- this recipe is definitely one of them.  Not only is it great for a low carb breakfast or brunch but the flavors taste complex when they're not!

Steak N Egg-Zola- Serves 1
1/3 cup leftover steak, cut into chunks or slices
1 Tbsp butter
3 eggs
1 Tbsp half n half
Salt n Pepper
1/4 cup plus 2 Tbsp Gorgonzola Cheese
1 Tbsp fresh chopped chives

Cut up about the steak into bite size chunks or slices.  Scramble 3 eggs in a bowl with half and half, a pinch of salt and a pinch of pepper.
Melt 1 tablespoon of butter in a skillet over medium heat.  Once the butter melts add in the steak and stir around in the butter to warm it up- about 30 seconds.
Add in the eggs and scramble stirring with a spatula.
Once the eggs are to your desired doneness, turn the heat to medium low and crumble in 1/4 cup gorgonzola cheese!
Turn off the heat and stir until the cheese is melted.
Transfer to a plate and garnish with chives and some more gorgonzola crumbles.  Season with a little more salt and pepper and enjoy!


#newcamera! hehe

Friday, April 10, 2015

lil carb London Broil Marinade


Nothing better than throwing a piece of steak on the grill- or is there?!  I made my marinated London broil last night for dinner and it was amazing!  Jason was skeptical of the cooking process because I  cooked it in the oven!  *Gasp*  But once he had his first bite he was sold.  And happy that he didn't have to grill in the rain.  It was a win- win for us. By cooking the London broil in the oven and pouring some of the marinade on top the meat stays incredible juicy - something that you lose when you grill it. Plus it's a recipe you can have any time of the year even if it's not officially grillin' season. This recipe is best if you can allow the London broil to marinate over night however I didn't get mine into the marinade until 7am and we ate it at 7pm and it was still two thumbs up. Once again, simple ingredients and easy cooking. Low carb cooking at it's best!


Messy marinade!
I assembled it in a large bowl so I could whisk all of the ingredients together really well.
Then transferred it to a 1 gallon storage bag.
I used a 1.30 Lb London Broil that was 1 inch thick

Next this baby hit the fridge... this is not a science project its actually the marinade and meat in a  storage bag lol

Remove meat from fridge at least 30 minutes before cooking to get the meat back down to room temperature- this helps it cook more evenly.
Time to flip the meat! Since I was putting the meat in the oven I covered it in about half of the marinade including the chopped onion and garlic!


Serve this along side my Cauliflower Mac n Cheese!  Great combination of flavors!


London Broil Marinade:
1/4 Cup Vegetable Oil
1/4 Cup Onion, minced
4 Garlic Cloves, roughly chopped
Zest of 1 Lemon
Juice of Half of the Lemon
1 Tbsp Spicy Mustard
2 Tbsp Balsamic Vinegar
1 Tbsp Worcestershire Sauce
1/2 Tsp Dried Oregano
1/2 Tsp Dried Basil
1 Tsp Paprika
Salt & Pepper
&
1-1.5Lb London Broil Steak, about 1 inch thick

Whisk all of the ingredients together in a large bowl.  Add London broil to a 1 gallon storage or freezer bag and pour in the marinade. Refrigerate and allow to marinate for 12-24 hours. 
Remove the marinated meat from the refrigerator at least 30 minutes before cooking to allow it to come back up to room temperature to ensure it cooks evenly.
--At this point you can cook it to your liking - either on the grill or in the oven--
This is how I cooked it last night to get a perfectly cooked medium steak:
Turn oven broil on to 500 degrees. Place meat on a tin foil lined baking sheet. Spoon about half of the marinade back over the meat including the onion and garlic.  I tucked the garlic under the meat so that it did not burn.  Then I broiled it for 6 minutes on the first side, flipped it and broiled another 6 minutes, flipped one last time and cooked for another 3 minutes. Then I let it rest for 10 minutes before slicing and serving. 
Serve this along side my Cauliflower Mac n Cheese or any of my sides!


Friday, February 20, 2015

lil carb Cheeseburger Casserole


When I was little I used to love having Hamburger Helper. It was the epitomy of a 'treat dinner'.  However, now I realize that a meal out of a box is not the most healthy dinner option. But we are in luck!  I have a recipe that tastes a thousand times better than the old favorite from my childhood, it comes together almost just as fast, and it is low carb!  It might not look gorgeous piled high in my bowl but let me tell you- it tastes SO flavorful and it reheats very well too!

unbaked
lil Carb Cheeseburger Casserole - Serves 3 - 
1 Lb Ground Beef
1/2 Medium Onion, chopped
2 Garlic Cloves, minced
8 oz Pack Button Mushrooms, chopped to desired size.
3 Cups Broccoli Florets, cut bite size
Salt and Pepper
6 oz Cheddar Cheese- white or yellow - plus 2oz to top with
2 Slices American Cheese
3/4 Cup Half and Half
3/4 Cup Mayonnaise


Preheat the oven to 375 degrees.
Steam broccoli florets for 4 minutes and set aside. 
Brown beef, onions, garlic and mushrooms over medium high heat until beef is cooked through.  Drain. Season with salt and pepper.  Add in steamed broccoli and toss together. Remove from the heat. 
In a medium sauce pan add in the half and half and the mayonnaise. Bring to a bubble. It should be pretty thick already. Season with salt and pepper and add in the american cheese slices. Whisk until cheese is melted then add in 3 oz of the cheddar, whisk until melted then add in the remaining 3 oz cheddar.  Whisk until thick and bubbly only about a minute. Taste for seasoning and add in more salt and pepper if needed.
Add ground meat into a casserole dish and pour cheese sauce over and mix together until cheese sauce coats the ground meat mixture. 
Top with last 2 oz of cheddar. 
Bake at 375 for 20-23 minutes. 
After it is done baking let sit for about 4 minutes to let the casserole rest - and cool off!-. 
Then dig in!!


Monday, January 26, 2015

lil carb Beef Stew

In preparation for the upcoming blizzard I stayed home from work and luckily I did because I am able to share this recipe with you!  Are you ready for the perfect snow day meal?! It's the kind of meal that will make you feel warm and fizzy inside. Even though snow is falling outside, inside you will be cuddly and satisfied with a belly good dinner.

Comfort food to the max!  OMG, it really is amazing!  The flavors in this classic comfort food dish are so savory you would never know that I modified it to be lower carb. Before this recipe I would think of beef stew as potatoes and dry meat- this recipe is the total opposite. You have to make it! Simple ingredients but loads of flavor.

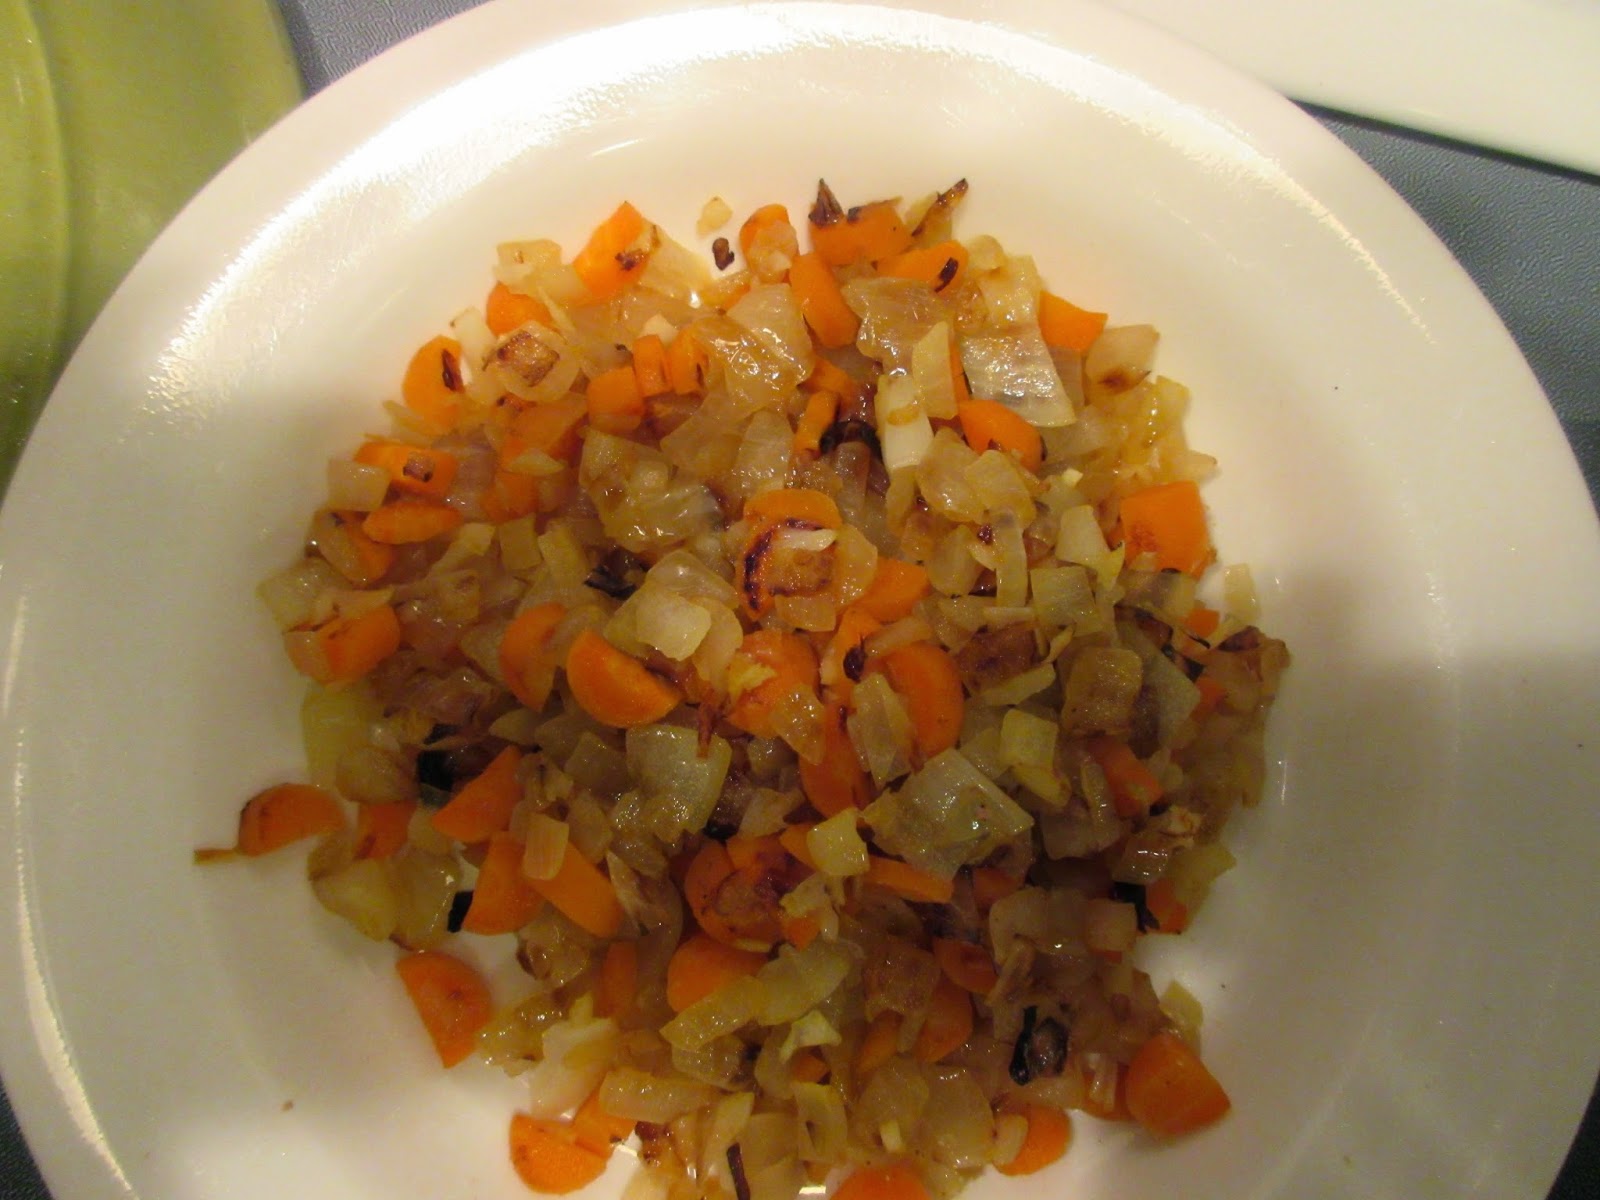
I started out with traditional stew ingredients- onion, garlic, and carrots all diced and sautéed in veggie oil.


I use baby carrots because I always have them in my fridge and they are already prepped for dicing- less work for me!


Once the veggies are softened and getting brown edges I remove them to a plate - we'll add them back in in a lil bit!

Instead of a traditional all purpose flour dredge I used coconut flour. 
For the meat- the supermarket makes it SO easy - they had pre cut and trimmed "stew meat".  It was all meant to be! Once again- less work!  I salt and peppered the meat and dredged it in the coconut flour.

To the stew pot that I cooked the vegetables I added in some more vegetable oil and browned all sides of the meat. 
I had to do about 4 batches because I did not want to crowd the pan and steam the meat.  
Instead, I wanted a nice brown crust.  In between each batch I used a lil more oil.

Just look at that meat!  Still pink on the inside but a nice crust on the outside- that is what I'm lookin' for!

Yuuuummmmm!

After all of the meat is browned I poured in red wine!  Oh the heavenly aroma at this stage of the game... let that delicious smell perfume your kitchen and let the wine reduce. 
Scrap the bottom of the pan for all the great meat bits that were left behind! 
Once the wine is reduced, add the meat back into the pan along with the softened veggies.

Then everybody gets into the pot... First: 2 cans of whole tomatoes, a bay leaf, fresh oregano, parsley and thyme, and beef broth. I also add in a 1/2 can of water from the tomato can to get all the flavor out of it. 


As far as the fresh herbs go- check your supermarket.  For 99 cents you can get about 3 tbsp worth of fresh herbs all year round- just enough for a meal or two without breaking the bank!

Then I add in mushrooms (I used just white button mushrooms that were already prepped and sliced- again- super easy!) and baby carrots that I cut into 3rds but you could certainly leave them whole.

Bring this mixture to a boil then lower the heat and simmer with the lid ON for about 45 minutes. Mixing every so often. Then remove the lid and simmer another hour and 15 to hour and a half with the lid OFF.  
Add in salt and pepper to taste and serve garnishing with parsley and parmesan cheese!

Lil Carb Beef Stew: -Serves 6-8-
3 lb beef stew meat, trimmed and cut into chunks
Vegetable oil, divided about 9 Tbsp
1 large onion, minced
About 10 baby carrots cut into a small dice - 1/2 cup
3 garlic cloves, minced
1/3 cup coconut flour
Salt and pepper to taste
1 cup red wine
2 28 oz cans of whole tomatoes 
- plus 1/2 can of water
1 3/4 cups beef broth
1 bay leaf
1 Tbsp fresh oregano, chopped
1 Tbsp fresh thyme, chopped
1 Tbsp fresh parsley chopped- plus some for garnishing
6-8 oz white mushrooms, whatever your supermarket has
About 20 baby carrots cut into 3rds- about a cup
Parmesan cheese for garnish

Heat a stew pot on medium high heat and warm 1 Tbsp vegetable oil and sauté the onion and small diced carrots for about 7-8 minutes. Add the garlic in and cook for another minute, stirring often. Remove the veggies from the pan and heat 2 Tbsp vegetable oil in the same pot.  Salt and pepper the beef and dredge in the coconut flour. In about 4 batches brown the meat on all sides until a brown crust forms. Be careful not to crowd the pan. Before starting a new batch add in another 2 Tbsp vegetable oil. When the meat is done browning, remove it to a plate.  To the stew pot pour in the red wine and scrap the bottom of the pan to loosen all the flavorful meat bits.  Let the wine reduce for 5 minutes. Then add the meat and sautéed veggies back into the pot. Pour in the 2 cans of tomatoes plus the 1/2 can water, beef broth and the fresh herbs and bay leaf. Stir. Then add in the mushrooms and big carrot chunks. Bring to a boil then lower the heat to medium low and simmer with the lid ON for 45 minutes. Stir every so often. Then remove the lid and simmer with the lid OFF for another hour and 15 minutes to an hour and a half. Season with salt and pepper. Remove the bay leaf and serve up a big bowl and garnish with chopped parsley and parmesan cheese.