My favorite recipe of the moment! This dish is literally the best broccoli ever! The perfect amount of each ingredient paired with some fresh broccoli and boom- amazing side dish that goes well with pretty much anything. I love to have this dish with some ahi tuna steaks! That has been our go-to Summer dinner this year. These flavors would also pair well with chicken or shrimp or tofu- whatever you like and have on hand. The absolute best part is this can be prepared in about 5 minutes... RUN and make this one!
Asian Style Broccoli- Serves 5
5 cups broccoli florets
1/4 cup water
For the sauce:
3 Tbsp low sodium soy sauce
1/4 tsp Sesame Oil
2 Tbsp Olive Oil
2 Tbsp water
2 cloves of garlic, minced
2 tsp ginger paste or fresh ginger minced
1 Tbsp toasted sesame seeds for garnish (optional)
Combine broccoli and 1/4 cup of water in a bowl and microwave for 2-3 minutes (depending on your microwave) to steam the broccoli. You can also steam the broccoli on the stove top. Drain broccoli of excess water after steaming.
In a medium size skillet add in the soy sauce, sesame oil, 2 Tbsp water, and olive oil. Then turn the heat on medium. Allow to bubble- takes about 3 minutes.
Then add the ginger and garlic to the pan. Stir well. Cook for a minute then add in the steamed broccoli and stir to coat the broccoli in the sauce. Cook another minute.
I have been craving all dishes that are Mexican inspired lately. I just cant get enough taco salads and burrito bowls and fajita chicken... Mexican cheese and sour cream and pickled jalapeños.... like I seriously am addicted!!! To go along side or underneath all of these awesome dishes I needed a bomb Mexican rice. This is not authentic by any means BUT it is delicious and it's super easy and totally customizable so I hope that makes up for the fact that it is not at all authentic.
Use your favorite salsa and go to town!!! This versatile dish is even perfect with rice, just sub some cooked rice for the cauliflower. You can please everyone with this dish! It almost sounds too easy... but its seriously a game changer for all you Mexican cravings!
low carb Mexican Rice- Serves 4 (1 cup per serving)
4 cups of riced cauliflower
1 green onion (aka scallion), sliced thin with b green and white separated
1/2 cup low carb salsa, I use Frontera Brand
1 Tbsp of butter, divided
1 Tbsp taco seasoning, get my recipe HERE)
Melt 1/2 Tbsp of butter over medium high heat.
Add in the white part of the scallion and stir.
After one minute add in the riced cauliflower and stir.
Add in another 1/2 Tbsp of butter and stir
Then add in the taco seasoning. Stir well to incorporate.
Cook for 3 minutes.
Add in the salsa, stir and cook for another 3 minutes. This helps cook out the raw cauliflower taste.
Top with the green top of the scallion and serve! Enjoy!
Nutritional Facts
Per Serving:
56 Calories
2.2 Grams of Protein
2 Grams of Carbs
*this is the nutritional facts for exactly the ingredients I used. If you use different salsa I encourage you to use the My Fitness Pal app to figure out the exact macros for your dish*
When I wrote that title I meant it! This is the best!!! Not only because it's delicious but it's also simple and easy to make and the ingredient list is super short. Don't let the chopping of a butternut squash deter you from making this recipe. Most grocery stores already have one chopped up for you! What I'm trying to say is- whatever you have to do to make this recipe just do it...
Watch the video above to see exactly how I chop up my squash and how much seasoning I use. Each squash is going to be a different size so the spice amount I list below are to be used as a guide. When seasoning your squash just make sure to get a nice, thin layer of seasoning onto all of your pieces and you will be good to go!
Preheat oven to 415 degrees.
Spray a large cookie sheet with non-stick spray.
Peel the squash, cut off the ends, cut in half, and remove the seeds.
Then cut each half into half moon shapes. Cut each half moon into 3 strips and then curt each strip into cubes. (Watch the video above for clarification)
Arrange the cubes of squash onto a baking sheet in a single layer.
Drizzle on the olive oil then sprinkle on salt and pepper, and then the garlic powder and chili powder.
Toss with clean hands and arrange again in a single layer.
Put into a 415 degree oven for 15 minutes.
Take out and toss with a spatula and continue baking for an additional 15 minutes (30 minutes total).
Let cook slightly and then ENJOY!
Every time Jason takes me to a steak house I crave the wedge salad. I love the refreshing crunch along side a nice juicy steak! I recently realized I can recreate that at home... yes, I really I am late to the party on this one. I shared my salad on Instagram and Snap Chat and I got quite a few messages saying to share the recipe. While this is so simple you can make it with your eyes closed, I decided to share my wedge salad with everyone! Serve this as a quick and simple lunch or as a side dish with your favorite grilled dinner.
My favorite way to enjoy this one is with a grilled strip steak and some grilled or roasted asparagus!
low carb Wedge Salad- Serves 1
1/4 head of iceberg lettuce
1/8 cup blue cheese crumbles
1/8 cup shredded red cabbage
4 cherry tomatoes, cut in half or fourths
3 slices of cooked bacon, crumbled up
Salt & pepper
+ your favorite salad dressing
To assemble, put your iceberg on a plate and break it apart a little.
Then add your dressing on top- this will help all the other ingredients to stick to it.
Then layer on the bacon, tomatoes, red cabbage and blue cheese crumbles.
Sprinkle with a little salt and some black pepper. Enjoy!
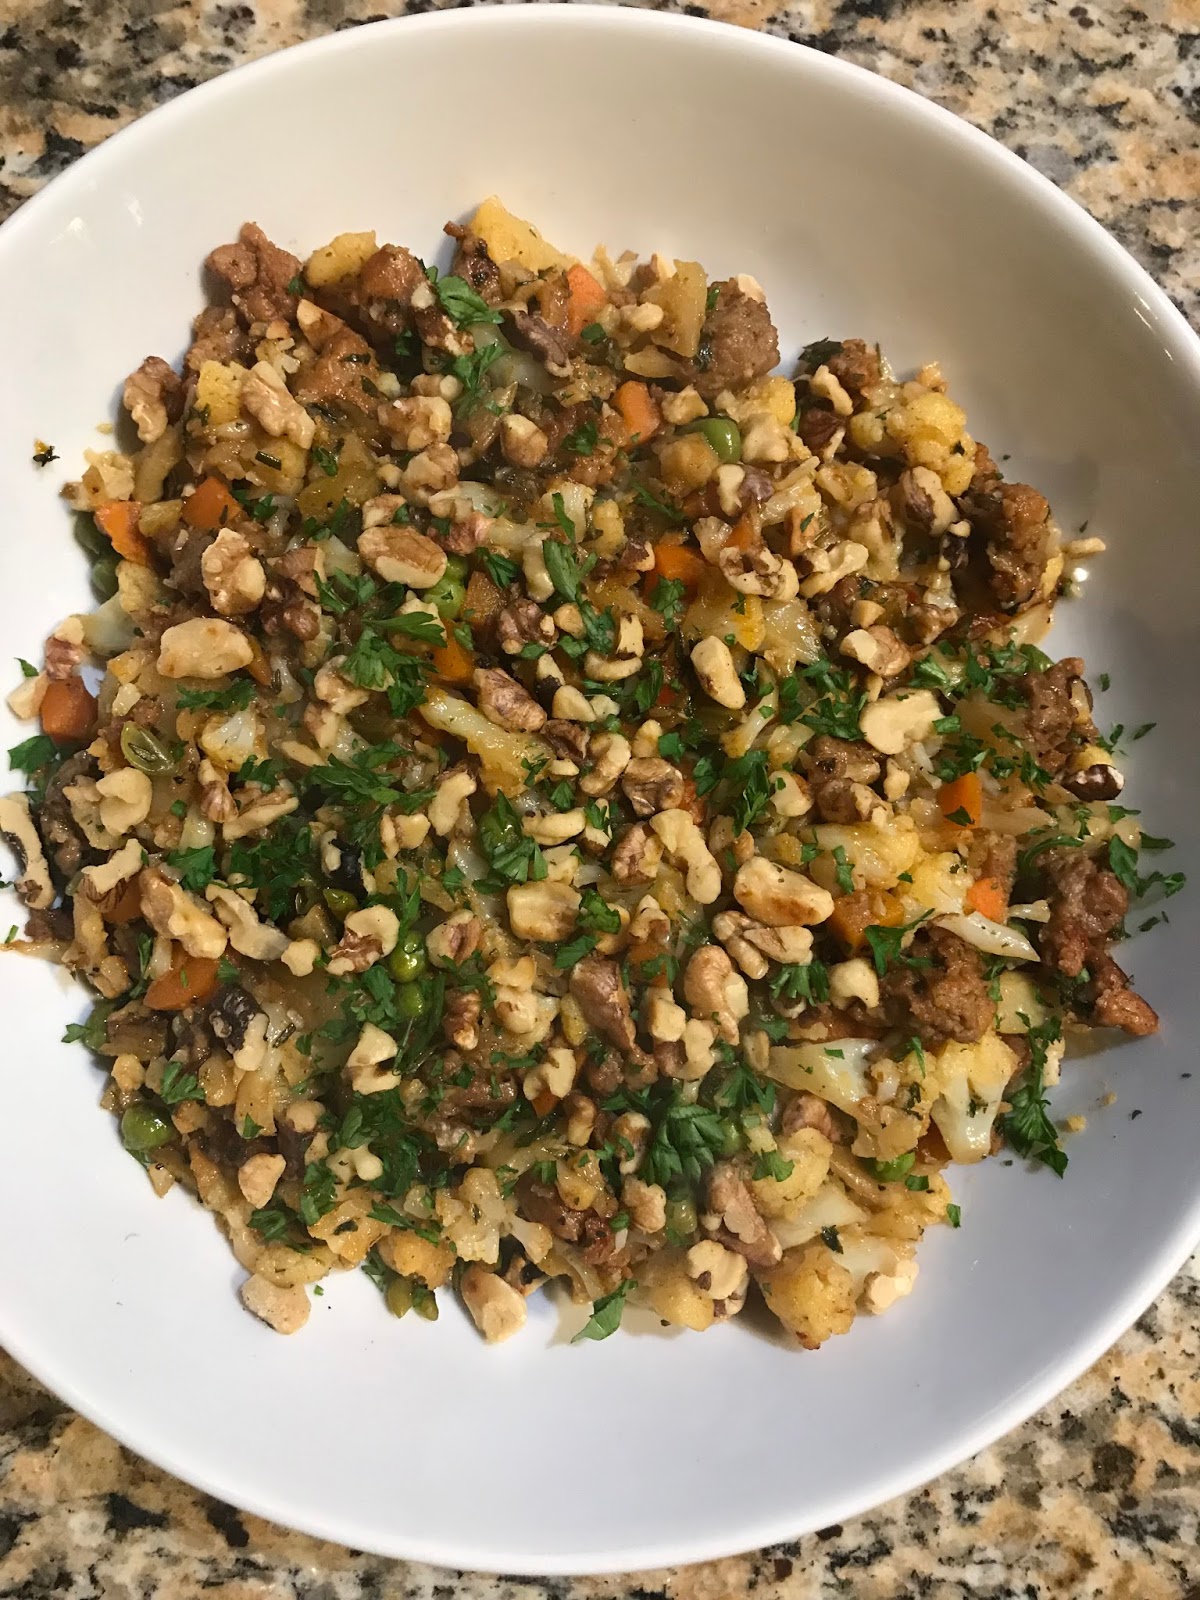
Just in time for Thanksgiving! Let me just say- I worked hard on this recipe because I wanted it to be perfect and I am beyond proud to say I think this is just about one of the best ever on my blog. Not only is it an amazing side dish BUT it can also be a great make ahead lunch or dinner for any time of the year. The ingredients are reminiscent of a comfort food classic that you can enjoy with your family and friends for the holidays or as a meal prep lunch at your desk. No matter how you decide to enjoy this one- make it. You will literally be in love... like I am right now... eating this as I am typing. *Bliss*
lil carb Sausage & Cauliflower Stuffing- Serves 8 as a side dish 3 Tbsp butter
1/2 cup onion, chopped
1/2 cup celery, chopped
2 cloves garlic, minced
5 cups cauliflower (about one medium head), chopped
2 Tbsp fresh parsley, chopped - Plus extra for garnishing
1/2 Tbsp fresh sage leaves, chopped
1 Tbsp fresh rosemary, chopped
1/2 lb ground Italian sausage, mild/sweet or hot (I used a combo of both!)
1 cup frozen peas and carrots
3/4 cup chicken or vegetable stock
1/2 cup chopped, toasted walnuts
In a skillet with high sides melt the butter over medium high heat.
Saute the onions and celery for 3 minutes.
Add in the ground sausage and cook for another 4 minutes breaking up the sausage as it cooks.
Next, add the chopped garlic and stir for 30 seconds until the garlic becomes fragrant.
Add in the cauliflower with a pinch of salt and pepper.
Turn the heat down to medium heat.
Cook, stirring occasionally for 8 minutes.
Then add in the rosemary, sage, and parsley along with the frozen peas and carrots.
Stir until mixed well.
Then, add the chicken stock to the pan and scrap the flavorful bits off the bottom of the pan.
Cover with a lid and allow to cook for 15 minutes or until all of your liquid has absorbed, stirring every couple minutes.
Then transfer to a serving bowl and top with toasted walnuts and some more chopped parsley. Enjoy!
*Recipe makes 8 - 1/2 cup servings as a side dish for the holidays*
(without dressing, using the ingredients I used in my video)
472 Calories
25 Grams Protein
12.5 Grams Net Carbs
So.. at first I thought that getting bored with the same old foods was a bad thing. But after I started thinking about it I realized it's a GREAT thing! By getting bored of foods it is keeping my mind sharp and forcing me to create yummy new recipes and put together new ideas. This next recipe was born in exactly that way. I was sick of the same old lunch salads I was eating and when I get sick of food I get sad. I really really love food and food should be an experience! Even if you're eating in your cubicle at work. You should still look forward to lunch. With this salad I get excited for lunch to come!!! Is it 12:01 yet? hehehe
lil carb Italian Sub Chopped Salad-
Serves 1 as a meal salad or 4 as a side salad
2 1/2 cup lettuce blend
2 Tbsp grated parmesan cheese
1/4 cup mozzarella cheese- use fresh, grated, or mozzarella balls (see video)
1/4 cup cucumber
8 Kalamata olives
2 Tbsp roasted red peppers
1/4 cup yellow bell pepper
2 Tbsp red onion
5 cherry tomatoes
5 slices pepperoni
1 1/2 oz salami
1/4 tsp dried oregano
Break apart lettuce leaves with your fingers into bite size pieces.
Then chop up everything else! Its that easy.
I like to combine in a big bowl then sprinkle with oregano and give a good mix with your favorite Italian dressing! My favorite is Kens Italian!
Pack this up for lunch, serve it as a side salad with your favorite dinner or enjoy right on the spot after you chop chop and drop! Enjoy!
SO.... I can't believe I have been keeping one of my easiest and basic low carb recipes from all you guys! lol This was not done intentionally it really is one of those recipes I could have sworn that I videoed waaaaay at the beginning but then when I checked back I never posted it! No more waiting- here it is- my basic go-to cauliflower mash recipe. This can be used any time you would usually use mashed potatoes! I especially enjoy this side dish because not only does it look exactly like fluffy mashed potatoes (watch my video if you don't believe me!) but it tastes better and it fills me up. Potatoes have always made me feel like my stomach is empty after I eat them. I know, I'm weird- or maybe I'm not- does anyone else feel like this?! My body as a whole just feels better when I am eating low carb which is why this recipe is a go-to! Try it out- I bet you will love it too!
lil carb Cauliflower Mash- Serves 2
1/2 large head of cauliflower OR 1 small head
3 1/2 Tbsp salted butter
1 tsp garlic powder
1 1/2 Tbsp Mayonnaise
Salt and Pepper to taste
Mild dried herb for garnishing, optional (such as parsley or chive)
To start off cut your cauliflower into palm size chunks and then cut those in half.
Using a steam basket and boiling water, steam your cauliflower for 5 minutes.
Place steamed cauliflower directly into a food processor. (You want to work quickly so it stays hot)
Add in the butter and mayo and pulse.
Scrape down the sides and add the garlic powder and a sprinkle of salt and pepper.
Pulse again until it is smooth.
Taste for seasoning and add more salt and pepper as needed.
Spoon into a serving bowl or directly onto your plates and sprinkle lightly with dried parsley or any other mild, dried herb that you like. Enjoy!
*When adding the mayo, garlic powder and butter add a little at a time. You might have more or less cauliflower than me so you may need to adjust your amounts. Watch my video above for further clarification.
Broccoli roasted in the oven is such a great side dish. Broccoli is very economical right now aka cheap! Which I am all about saving a buck- especially at this time of the year. Mama Bear needs to buy Christmas gifts! haha Oh and did I mention that my Italian roasted broccoli is low carb and delicious!? Make this side dish part of your dinner plate this week. It's already on my menu along side my lil carb Meatloaf!
lil carb Italian Roasted Broccoli- Serves 3
4 cups broccoli, cut into florets
1 1/2 cups sliced mushrooms
2 Tbsp extra virgin olive oil
1 tsp onion powder
1/4 tsp garlic powder
1/4 tsp crushed red pepper flake, optional
1 tsp Italian seasoning
1/2 tsp black pepper
3 Tbsp salted butter
1/4 cup whole milk mozzarella, shredded
2 Tbsp grated parmesan cheese
Preheat your oven to 425 degrees.
On a large sheet pan covered in tin foil and sprayed with cooking spray drop your broccoli.
Drizzle on the olive oil then sprinkle on all the garlic powder, onion powder, red pepper flake, Italian seasoning, and pepper.
Toss well to coat all the broccoli. Spread in a single layer and roast in the oven for 15 minutes (keep an eye to make sure your oven doesn't burn your broccoli).
Then remove pan from the oven and toss butter with the roasted broccoli.
Top the broccoli with the mozzarella and parmesan and bake an additional 5 minutes.
Remove from oven and serve up! ENJOY!
With Thanksgiving and Christmas quickly approaching I am sharing as many recipes as I can to help you with low-carb-holiday-eating! Let's face it, the holidays are centered around food and when you are on a specific diet- whatever it may be- it can easily put a damper on the holiday festivities. Look no further- I have everyone covered. Fill up your plate with some healthy proteins and lots of veggies and you will be good to go! A staple on my dinner table and holiday table is my lil carb Green Bean side dish. It is SO good- words cannot even describe. The key ingredient here is some champagne vinegar. In your grocery store I bet you have seen flavored vinegars and maybe you have some at home and don't know what to do with them- well, use them with this recipe! The vinegar I use in my recipe is a Pear Champagne Balsamic Vinegar and it is fantastic! If you can't find a flavored vinegar just use plain champagne vinegar. Get excited! It is officially "holidaytime"!!!
lil carb Green Bean Side Dish-Serves 6
1 lb green beans, ends cut off
8-10 garlic cloves, minced
1 Tbsp extra virgin olive oil
3 Tbsp butter
2 Tbsp champagne vinegar
Salt & Pepper to taste
To a large skillet add in the butter, oil, and garlic. Then turn on the skillet to medium heat.
This will perfume the oil and butter.
Once the garlic starts to bubble - about 1-2 minutes- add in the green beans.*
Sprinkle with pepper and salt, stir and cook for about 3 minutes.
The beans will be bright green and the garlic will be golden brown.
Then splash in the vinegar and stir.
Cook for 1 minute.
Then spoon the beans onto a platter and top with the pan sauce and garlic. ENJOY!
*If you do not like crispy green beans then blanch the green beans in boiling water for 2 minutes and then put them in ice water. Then drain the water from them and proceed to the next step. Watch my above video for further explanation.
I have been making this side dish for years now... YEARS! This cauli-mac -as I like to call it- is perfection. It comes out magnificently every time- creamy cheese sauce and fresh cauliflower are a match made in food=heaven. This side is perfect for a busy weeknight dinner but also a great make ahead for your Thanksgiving table! Either way, you need this in your life- it's that good!
lil carb Cauliflower Mac and Cheese- Serves 6
1 medium size head cauliflower, cut into small bite size florets (about 4 cups)
1 cup heavy cream
3 Oz cream cheese
1 Tbsp mustard- use your favorite! (I use Whole Grain Dijon by Grey Poupon)
1 Tbsp mayonnaise
1 1/2 tsp garlic powder
3 Slices American Cheese, white or yellow
1/2 Cup Cheddar Cheese + more for topping
1/4 tsp salt (adjust to your taste)
1/4 tsp pepper
Preheat oven to 375 degrees.
Bring a pot of water to a boil on the stove and either boil the cauliflower for 4 minutes and drain well or steam cauliflower for 4 minutes and make sure to shake excess water off.
OR you can steam the cauliflower in the microwave in a bowl with 2 tablespoons of water for 2 minutes.
Then add to an 8X8 baking pan that been lightly sprayed with cooking spray.
In a saucepan heat heavy cream then stir in the cream cheese until melted.
Add in mayo, mustard, garlic powder and salt and pepper.
Whisk until combined then stir in the american cheese until melted. Then in 2 batches add in the 1/2 cup of cheddar and whisk until it melts. Cook for another minute until the mixture is thick and velvety. Pour cheese mixture over the top of the cauliflower in the baking dish. Mix the florets with the cheese to ensure even coverage. Top with additional cheddar cheese and put into the oven. Cook for 30 minutes or until the sauce is bubbly and the cheese on top is melted and browned. Remove from the oven and let sit for at least 5 minutes to cool and allow the sauce to thicken.
Then.... ENJOY!
This recipe is hands down in my top ten. When I'm looking to make a simple and quick side dish that I know Jason will love I always always make this cauli-rice. I recently made a batch of this rice and added it to my lunch prep too! Follow me on Snap Chat to see things like that! ID: lilpieceofhart Also....Something really cool that happened to me the other day - I was in Wegmans grocery store shopping and they have a lil kiosk where people make samples of food and hand them out and I smelled what the woman was making and I'm like "I know that smell" lol and sure enough I was right- it was cauliflower rice! She made it just like me and it made me smile. And to answer your question- OF COURSE I tried it. haha It was amazing. As much as I enjoy cooking I really do enjoy when I can try other peoples food too. I'm just food obsessed. The ush. Ok, ok I'll get on with the recipe. It's literally so good. I used to make it all the time with brown rice and now I use cauliflower rice instead and dare I say it's better?!? Try it!
lil carb Cauliflower Rice with Garlic & Peas- Makes 4 servings
4 cups cauliflower (1/2 a large head), riced
-(Link for how to rice cauliflower)- leave the cauliflower raw after you food process it or grate it.
3 cloves garlic, minced
1/2 tsp onion powder
1/2 tsp garlic powder
1 cup frozen peas
1 1/2 Tbsp vegetable oil
4 Tbsp butter (I use salted butter), divided
1/4 tsp salt
1/4 tsp pepper
Grate up your cauliflower and set aside.
In a large skillet on medium high heat add in 1 tablespoon of butter and the vegetable oil.
Right after you add in the butter and oil add in the garlic. This will help infuse the garlic flavor into the oil and butter and they will all heat up together. Once the garlic just starts to become golden brown add in the cauliflower.
Mix well to coat the cauliflower rice in the butter and oil.
Low the heat to medium and add in salt, pepper, garlic and onion powder.
Mix well.
Make a well in the middle of your pan and add in the peas. Allow to cook for about 30 seconds then mix in with the rice and allow to cook for about 1 minute until they are warmed through.
Then add in remaining 3 tablespoons of butter.
Taste for seasoning- add more spices or salt and pepper to your taste.
Then... ENJOY!
In case anyone didn't know I thought I would start off this post by coming right out and saying it!
Roasting fennel is my favorite way to eat it. I can devour this recipe all on my own and not feel guilty about it because it is low carb and comes together super easily. Fennel is one of those weird veggies I used to see in the supermarket and not know what to do with it. How do I cook it? What does it go good with? It smells like licorice- I will not like it. Well if you have thought this same thing about fennel please try this recipe! Once the fennel roasts the flavor mellows out and it becomes caramelized and buttery omg- SO good! Check out my video on how easy this is to make and then get in the kitchen and whip this up!
lil carb Roasted Fennel- Serves 2
2 bulbs of fennel, chopped reserving 2 TBSP of fennel fronds (see my video for further explanation)
1 tsp onion powder
1/2 tsp salt
1/4 tsp pepper
1 tsp Truvia
3 Tbsp extra virgin olive oil
5 whole cloves of garlic
1 lemon cut into 6 wedges
Preheat you oven to 400 degrees.
Cut off the stalks of your fennel then reserve 3 tbsp of fronds- the green top parts.
Now remove the outer layer of the fennel bulbs and slice in half and then thinly slice each half into thin half moon shapes.
Arrange on a large baking sheet covered in tin foil.
Sprinkle with the salt, pepper, onion powder, and Truvia.
Add the garlic cloves and the olive oil.
Toss everything together with clean hands.
Then take the lemon slices and squeeze them over the fennel then drop them onto the baking sheet.
Toss one last time and then roast in the oven for 15 minutes.
Take out and toss.
Put back into the oven for another 5 minutes- watching closely so it does not burn.
Then it's time to... ENJOY!
Labor day is now a memory and I still can't believe how fast this Summer went. I swear every year it goes by quicker and quicker. Anyway- in my effort to keep Summer alive I am sharing a really tasty side dish with you! Summer tomatoes are the best- so get em while you still can and enjoy these marinated tomatoes tonight using only a handful of fresh ingredients. Happy Summer!
lil carb Balsamic Marinated Tomatoes- Serves 4
2 Large Tomatoes, sliced thick into 4 slices (end slices sprinkle with salt and pepper for a snack)
3 Tbsp Balsamic Vinegar
1/2 onion, chopped
1 Clove Garlic, chopped
2.5 oz of greens- arugula, spinach, kale, or a Vita Blend Mix
1/3 cup shredded mozzarella cheese
1/4 cup Parmesan cheese
Salt & Pepper
1 Tbsp Olive Oil
Slice tomatoes thick and place in a shallow dish. Pour balsamic over tomatoes, turning tomatoes to coat and set aside. Let them marinate for at least 10 minutes.
Take tomatoes out of the marinade and place on a baking sheet and sprinkle each tomato with salt and pepper- reserve balsamic marinade.
In a skillet over medium heat sauté onions and garlic for 3-4 minutes in 1 tbsp olive oil. Add in the greens and stir until wilted then pour reserved balsamic marinade over greens and stir until most of the balsamic cooks off 1-2 minutes. Top each tomato with even amounts of the warm mixed greens mixture. Then top with mozzarella cheese and then parmesan cheese. Broil until the cheese is melted only 1-2 minutes. Enjoy!
One of the first things I knew I wanted at our new house was fresh herbs. I love cooking with them! Fresh herbs bring a welcomed earthiness and enhance the flavors of food. It's such a treat to go out side and cut what I need right off of the plant. Sometimes I just stick my nose right in the plant and inhale- Mmmm and I can't help but smile. Jason thinks I'm nuts but I don't care. At the old house we had a whole garden but decided on just keeping a few planters this year. We planted basil, rosemary, chives and parsley this year. These pictures were taken the day we planted them but in a few short weeks the plants have grown huge. So huge that I decided to whip up some basil pesto. It's a great way to trim down your herbs to keep them healthy and a great low carb addition for your next meal!
*The best part about pesto is you can change up the recipe to suit whatever you like. For instance- start with the basil and pine nuts then add more or less parmesan depending on how cheesy you like pesto- same goes for the garlic. I love garlic but some people only like to use it sparingly. Lastly, depending on how chunky or wet you want the constancy to be you add more or less olive oil. That's the beauty of cooking my peeps- add in a little of this and a little of that until you enjoy the flavor. Cooking is never an exact science. That's where the fun begins!
lil carb Basil Pesto
4 cups of fresh basil leaves, tightly packed
1 cup* parmesan cheese, grated
1/2 cup pine nuts
4+ garlic cloves* ( I like everything extra garlicky- I added 7 cloves!)
1 tsp salt - adjust to your taste
1/2 tsp pepper
1+ cup extra virgin olive oil*
Combine everything except the olive oil into a food processor.
Turn on the food processor and let it go for about 30 seconds until all the ingredients are combined.
Then drizzle in the olive oil while the processor is still on.
If you like more oil add it until you get the consistency you want.
I like it a little thicker just like this:
This will keep in the fridge for about a week in an airtight container.
You can also freeze it for up to six months. The best way to do this is put a thin layer of olive oil on top to keep it fresh and to keep it from turning brown. When it's snowing out and you're craving pesto just take out your container, let it soften enough to scoop out what you need then let it come to room temperature and serve!
What can you make with this pesto besides dipping bread in it?!
One of the first things I knew I wanted at our new house was fresh herbs. I love cooking with them! Fresh herbs bring a welcomed earthiness and enhance the flavors of food. It's such a treat to go out side and cut what I need right off of the plant. Sometimes I just stick my nose right in the plant and inhale- Mmmm and I can't help but smile. Jason thinks I'm nuts but I don't care. At the old house we had a whole garden but decided on just keeping a few planters this year. We planted basil, rosemary, chives and parsley this year. These pictures were taken the day we planted them but in a few short weeks the plants have grown huge. So huge that I decided to whip up some basil pesto. It's a great way to trim down your herbs to keep them healthy and a great low carb addition for your next meal!
*The best part about pesto is you can change up the recipe to suit whatever you like. For instance- start with the basil and pine nuts then add more or less parmesan depending on how cheesy you like pesto- same goes for the garlic. I love garlic but some people only like to use it sparingly. Lastly, depending on how chunky or wet you want the constancy to be you add more or less olive oil. That's the beauty of cooking my peeps- add in a little of this and a little of that until you enjoy the flavor. Cooking is never an exact science. That's where the fun begins!
lil carb Basil Pesto
4 cups of fresh basil leaves, tightly packed
1 cup* parmesan cheese, grated
1/2 cup pine nuts
4+ garlic cloves* ( I like everything extra garlicky- I added 7 cloves!)
1 tsp salt - adjust to your taste
1/2 tsp pepper
1+ cup extra virgin olive oil*
Combine everything except the olive oil into a food processor.
Turn on the food processor and let it go for about 30 seconds until all the ingredients are combined.
Then drizzle in the olive oil while the processor is still on.
If you like more oil add it until you get the consistency you want.
I like it a little thicker just like this:
This will keep in the fridge for about a week in an airtight container.
You can also freeze it for up to six months. The best way to do this is put a thin layer of olive oil on top to keep it fresh and to keep it from turning brown. When it's snowing out and you're craving pesto just take out your container, let it soften enough to scoop out what you need then let it come to room temperature and serve!
What can you make with this pesto besides dipping bread in it?!
Basil and summer pretty much go hand in hand and since I grow my own you guys know I have a TON right now. This classic platter is just so timeless and delicious but with the lil spin I put on it you will enjoy it like its a new dish! Adding buttery pine nuts gives the platter a welcoming crunch and fresh chopped chives give a subtle onion-y flavor that I always crave in any salad. I love enjoying these last few weeks of Summer where my herbs are plentiful and tomatoes taste like heaven! Pretty soon well be drinking pumpkin everything and wearing scarves lol! lil carb Tomato Basil Platter- Serves 4-6
3 tomatoes, sliced
3 Tbsp fresh chopped chives
1- 8oz ball of fresh mozzarella, sliced
About 1 cup of basil leaves
1/4 cup pine nuts, toasted
2 Tbsp Olive Oil
Balsamic Vinegar or Glaze, about 3 Tbsp (use as much or as little as you prefer)
Salt and pepper
On a oval or round platter layer the tomato and whole basil leaves around the platter. Slice the mozzarella then cut it in halves or quarters and pile in the center of your platter.
Sprinkle with salt and pepper.
Drizzle with olive oil and top with chopped chives and toasted pine nuts. --At this point you can prepare this platter ahead of time and cover it in plastic wrap and refrigerate it until you are ready to serve.
Right before serving drizzle with balsamic glaze or balsamic vinegar. Enjoy!
First off I love anything pickled. Like, put a shoe in some vinegar and I'm good to go. JK but seriously pickling is such an easy way to fancy-up a dish or to impress guests or to just make your meal that much tastier. My pickled red onions can go on so many things too- salads, burgers, eggs! Literally the sky's the limit and the world is yours! Let's do it!
lil carb Pickled Red Onions
1 Mason Jar
1 medium red onion, cut in half and thinly sliced
1/2 cup apple cider vinegar
2 Tbsp white vinegar OR red wine vinegar
1 1/4 cup water
3 tsp Truvia, or your favorite granulated sweetener- just check the carbs
2 tsp salt
1/2 tsp mustard seeds
1/2 tsp dill seeds
1/8 tsp red pepper flakes, optional
2 cloves of garlic, cut in half
In a small sauce pan over medium heat add the water and Truvia. Whisk together just until all the trivia is mixed in. Turn off the heat and set aside.
Then, prep your onion by chopping it in half and thinly slicing it- the thinner the better.
Add the onions to your mason jar along with the garlic cloves.
Then add in the mustard seed, dill seed, and red pepper flake if using.
Pour in the white vinegar, apple cider vinegar, and water/truvia mixture.
Pop the lid on and give the jar a good shake and refrigerate for at least 1 hour before serving but the longer it sits the better they will get. 24 hours is optimal. ENJOY!
I love this salad using my pickled red onions! Romain lettuce, pulled chicken, cherry tomatoes, pickled onions, and a drizzle of vinaigrette!
I just love cooking with fresh vegetables. One of my 'flavors of the week' for veggie sides lately has been kale. Not only is it a gorgeous green that is able to hold up to all different dressings and meals but it has so many tremendous health benefits. Being that kale is a super food I enjoy cooking with it a few times a week. My old trusty recipe is a simple kale sauté that anyone can do with just a handful of ingredients. This dish sounds simple but the flavor is anything but!
lil carb Kale Saute- Serves 4
8 cups kale leaves, tightly packed
2 Tbsp extra virgin olive oil
1 clove of garlic, minced
1/8- 1/4 tsp red pepper flake (optional)
Salt & Pepper
Squeeze of fresh lemon (1/2 tsp worth)
Heat the oil in a skillet over medium high heat.
Sauté the garlic for about a minute.
Add in the kale, in batches if you have a small skillet like me.
Continue to add kale, stir, let wilt, and then add more until all of your kale is in the skillet.
Sprinkle with salt and pepper and the red pepper flake if you are using.
Spaghetti squash is a vegetable I never ate before I started my low carb journey but now we eat it ALL the time! It is a perfect substitute for pasta and you get your veggie serving as well! It is super simple to make too! Just a few minutes and you are ready to go!
How to Make Spaghetti Squash Noodles- makes 4 servings:
2 1/2 lb Spaghetti Squash
Microwave
Pierce squash with about 8-10 knife holes. Microwave on high for 5 minutes then flip squash over and microwave another 4 1/2 minutes. Let sit in microwave of 1 minute. Remove with oven mitts, cut in half, scoop out seeds and mushy center and "rake" out the flesh to resemble noodles.
What to make with Spaghetti Squash Noodles?!
Check out some of my recipes!
If you're in the mood for a laugh watch my video on how I made this side dish and see exactly how I pronounced gratin- hehe!
I posted this recipe many moons ago and decided that it needed a revamp. I also recorded the how-to video on how I make this side dish so I am reposting today!
Yes, very exciting!
This side dish is SO good- and it is actually how I fell in love with a young lad named Gruyere... jk its just cheese and not a person BUT this cheese is relatively cheap and it is super flavorful. I always buy the smoked version. I have made this with regular gruyere that hasn't been smoked and I am sorry to say it does not taste the same. Still good, just not as amazing as the smoked cheese. Get that if you can!
This recipe is also a perfect way to use your overabundance of zucchini- a great way to utilize in-season veggies!
lil carb Zucchini Gratin- serves 4
1 Tbsp butter 1 lb of fresh zucchini, grated 1/2 onion, minced 2 cloves garlic, minced Salt & pepper to taste 1/4 tsp- 1 tsp nutmeg* 1/2 cup half and half OR Heavy Cream 4 oz smoked gruyere cheese, grated Grate zucchini and place in a colander. Sprinkle with salt to release moisture. Let sit 5- 25 minutes then squeeze to drain out liquid. Sauté onions and garlic in 1 tablespoon of butter for 2-3 minutes and sprinkle with salt and pepper. Add zucchini and sprinkle with nutmeg*. Cook about 2 minutes until zucchini is warmed through. Check for seasonings- add more salt, pepper, or nutmeg if needed. Next add the half and half and stir until thickened- about 2 minutes- taste one more time for seasoning. Put in a greased baking dish and top with the grated gruyere cheese. Bake at 375 for 10 minutes and then place under the broiler for a minute or 2 to brown the cheese. Serve immediately. *Nutmeg seasoning amount is up to you- taste as you go but be careful because if you add too much nutmeg there is not much you can do. Watch my video above for how I like to add and taste.* ENJOY!
Steak houses are pretty much amazing... cooking steaks at home can be equally as amazing! However, sometimes Jason and I just don't have it in our budget to go to a steak house or to buy $15 steaks for one dinner. But, if anyone knows me- when I have a craving I just gotta have it! In this case when I'm craving that steak I can get the same flavors from this dinner! I like to call this my "Poor Mans Steak Dinner" because you will get all of the flavors without breaking the bank. OMG I just love these kind of recipes! *Smile*
lil Carb Steak House Burger & Brussel Sprouts-Serves 4
Burgers
1 1/3 lb of ground beef
1 Tbsp season salt
4 slices of red onion
4 slices of blue cheese OR 1 cup of crumbles
Brussel Sprouts
24 medium-large sized brussels sprouts
2 Tbsp olive oil
1/2 tsp garlic powder
1/2 tsp onion powder
1/2 tsp pepper
1/2 tsp salt
1 Tbsp butter
4 tbsp balsamic glaze
Preheat oven to 425 degrees.
Cut end off of brussels sprouts and cut in half for medium size and for large brussels sprouts cut them half and then cut each half in half again.
Arrange on a large baking pan covered in foil. (If you're neurotic like me then spray it with cooking spray before you add the veggies hehe)
Drizzle the olive oil all over the brussels sprouts then sprinkle on the garlic powder, onion powder, salt, and pepper.
Toss well with clean hands.
Bake these in the oven for 10 minutes.
Toss well with a spatula.
Bake for another 10 minutes.
Remove from the oven and turn the oven off.
Break up the tablespoon of butter with your hands and scatter across the veggies. Toss one more time and then put them back into the oven to melt the butter and stay warm.
While the brussels sprouts are baking form the beef into 4 oblong burger patties.
Season both sides of the patties with the season salt.
Preheat a grill pan to high or use a skillet on medium high heat.
Grill for about 5 minutes on the first side. (your stove will vary with mine so adjust your cook time accordingly)
Flip the burgers and top each one with one slice of red onion broken into rings.
Top with the blue cheese slices or 1/4 cup crumbles per burger.
Let cook another 5 minutes on the second side.
To plate- serve your burger along side 1/4 of the brussels sprouts from your baking pan. Top your brussels sprouts with 1 Tbsp of glaze per serving and ENJOY!